There were two major trips I wanted to take before leaving Arizona for good: the Grand Canyon and Page, AZ. With time running short and money being tied up in savings for the big move, I had to pick just one. People take trips across the country to see the Grand Canyon all the time, so even if I ended up permanently located across the country, it wouldn’t be that weird to plan a trip specifically to see the Grand Canyon. Page, on the other hand, is a bit more off the beaten path, and there were really only two things we wanted to see there. Page it was!
Update: See new images from Antelope Canyon, and finally, photos from the Grand Canyon!
Page is located in extreme northern Arizona, minutes away from the Utah border and six hours away from Tucson. The land was originally located on Navajo land, but was traded and developed into a city with the development of the Glen Canyon Dam. The Glen Canyon Recreational Area (GCRA) with Lake Powell is a huge tourist attractions in the area, along with Horseshoe Bend and Antelope Canyon.
It seemed difficult to do anything worthwhile, but relatively inexpensive at GCRA/Lake Powell, so that was nixed from our itinerary. Kayaking or taking a boat to prime hiking spots would have been very tempting, but Horseshoe Bend and Antelope Canyon were the real reasons we started looking into a trip to Page. Horseshoe Bend is absolutely free, and we could do Antelope Canyon for $100 or less.
Horseshoe Bend
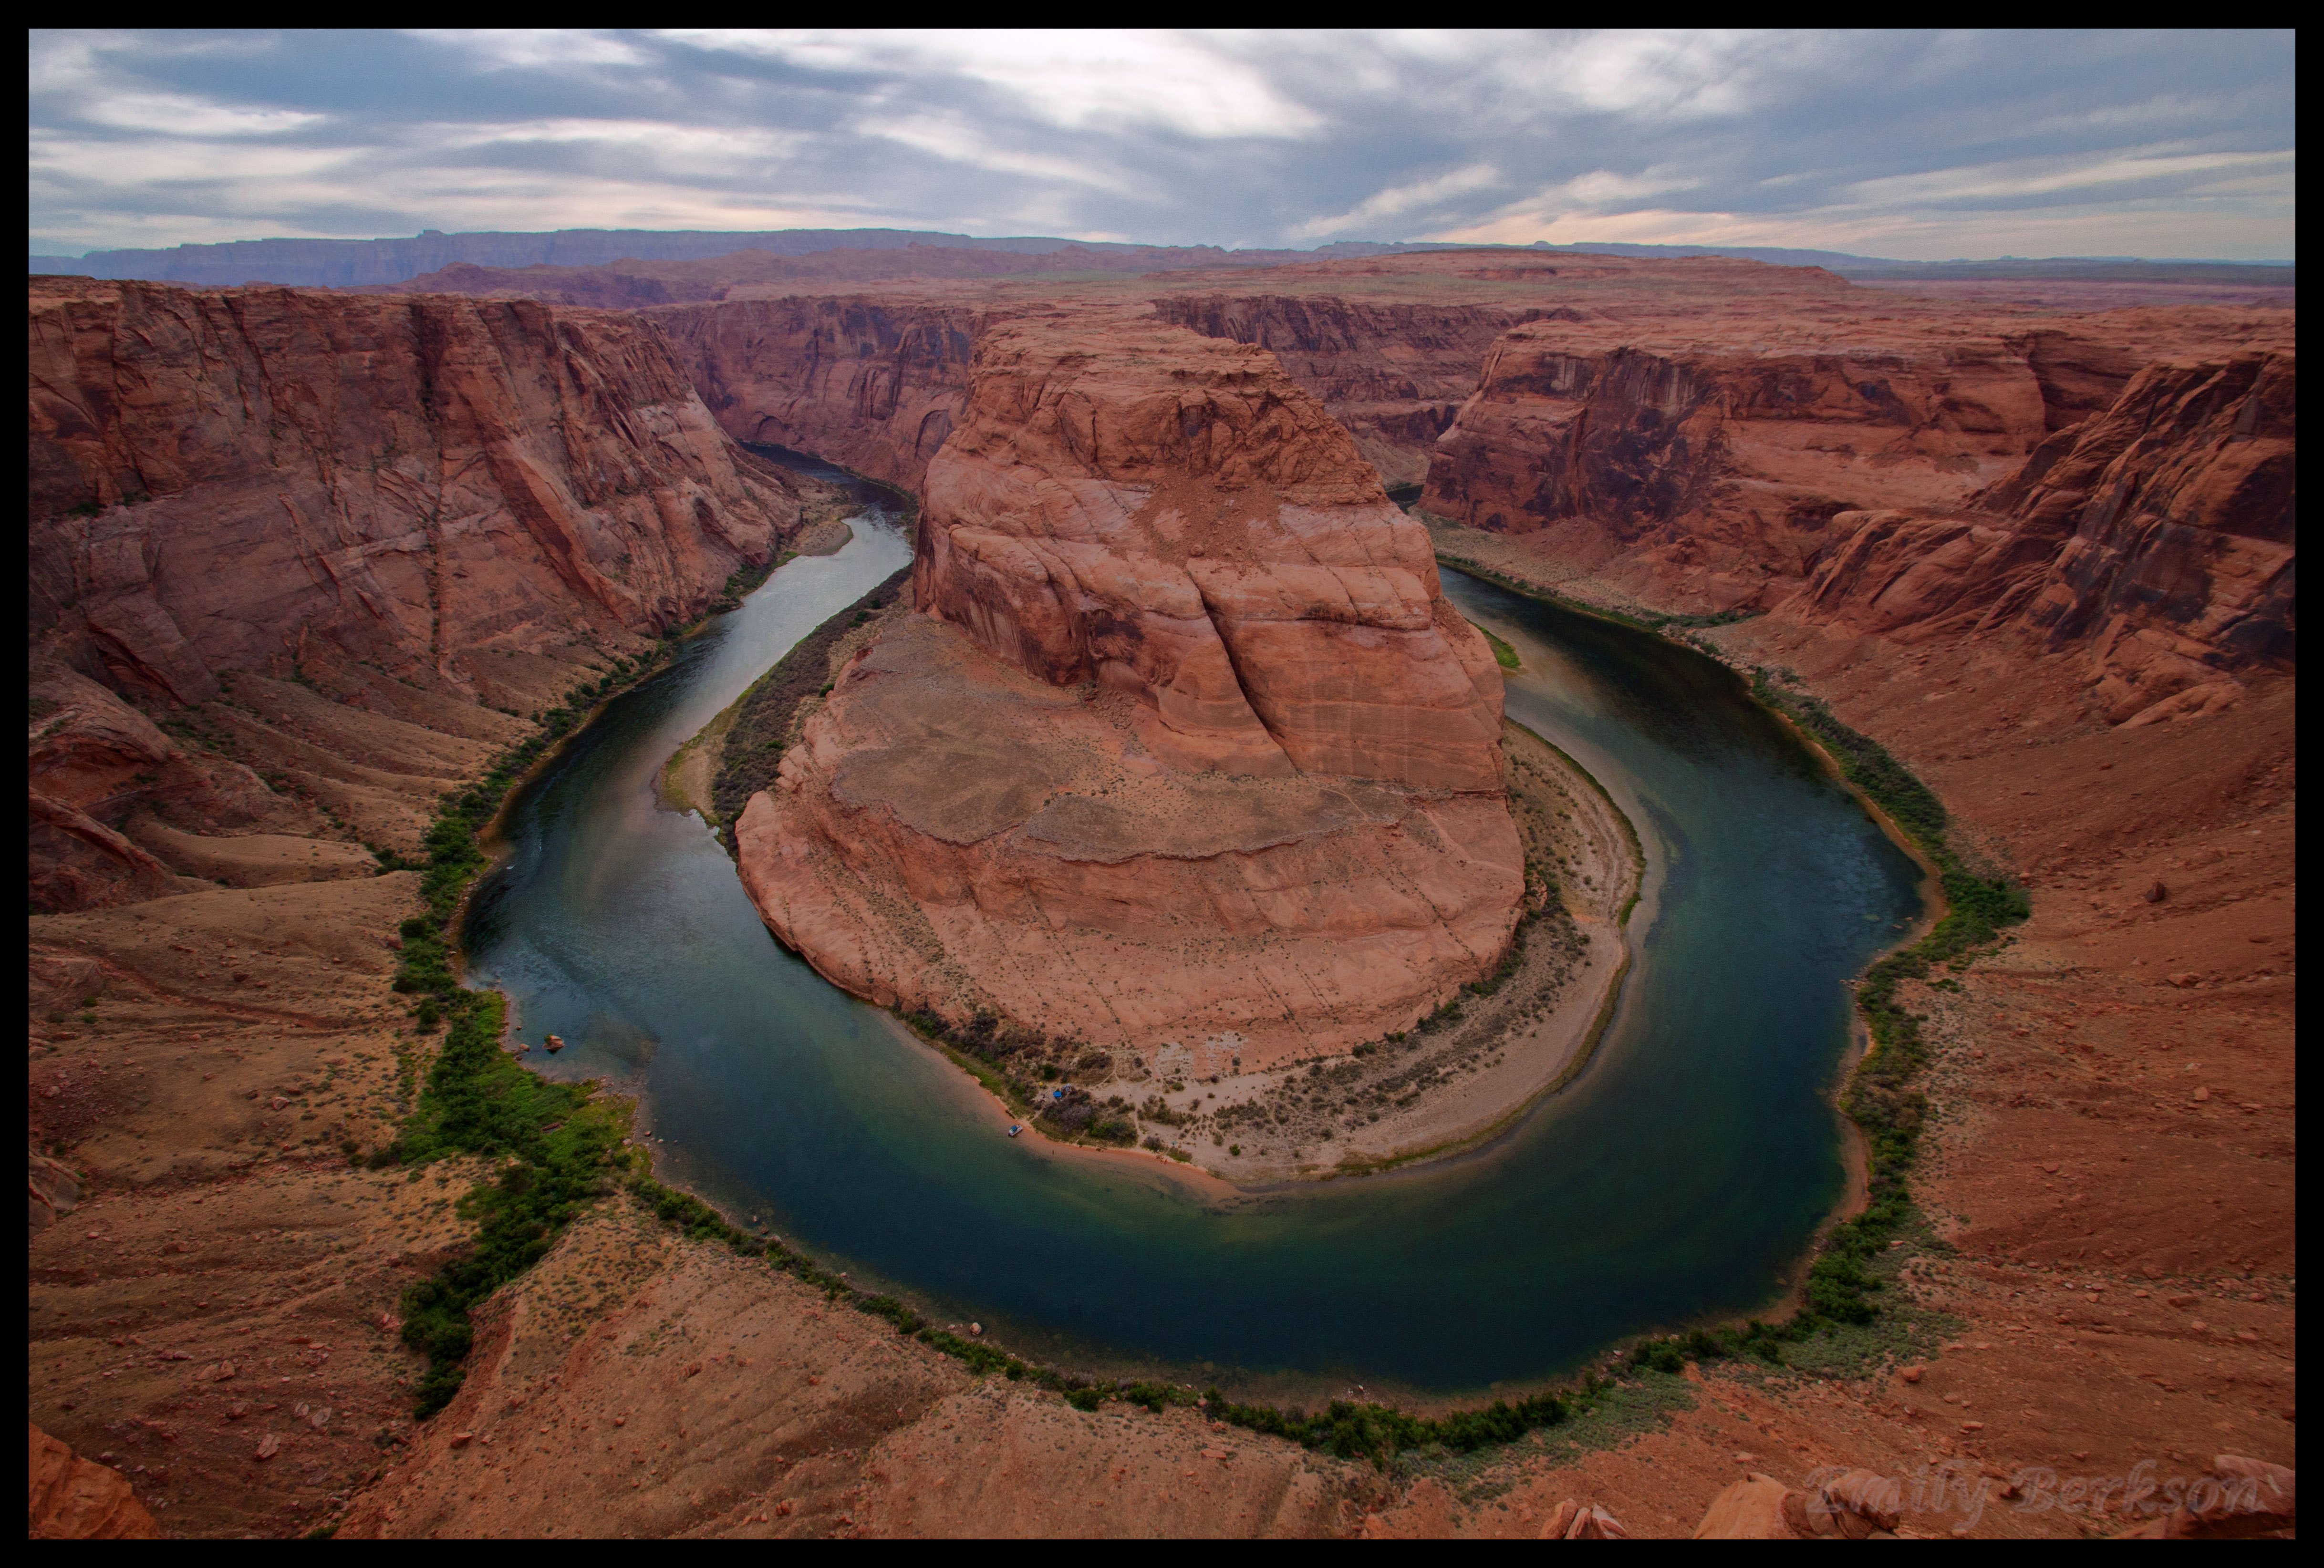
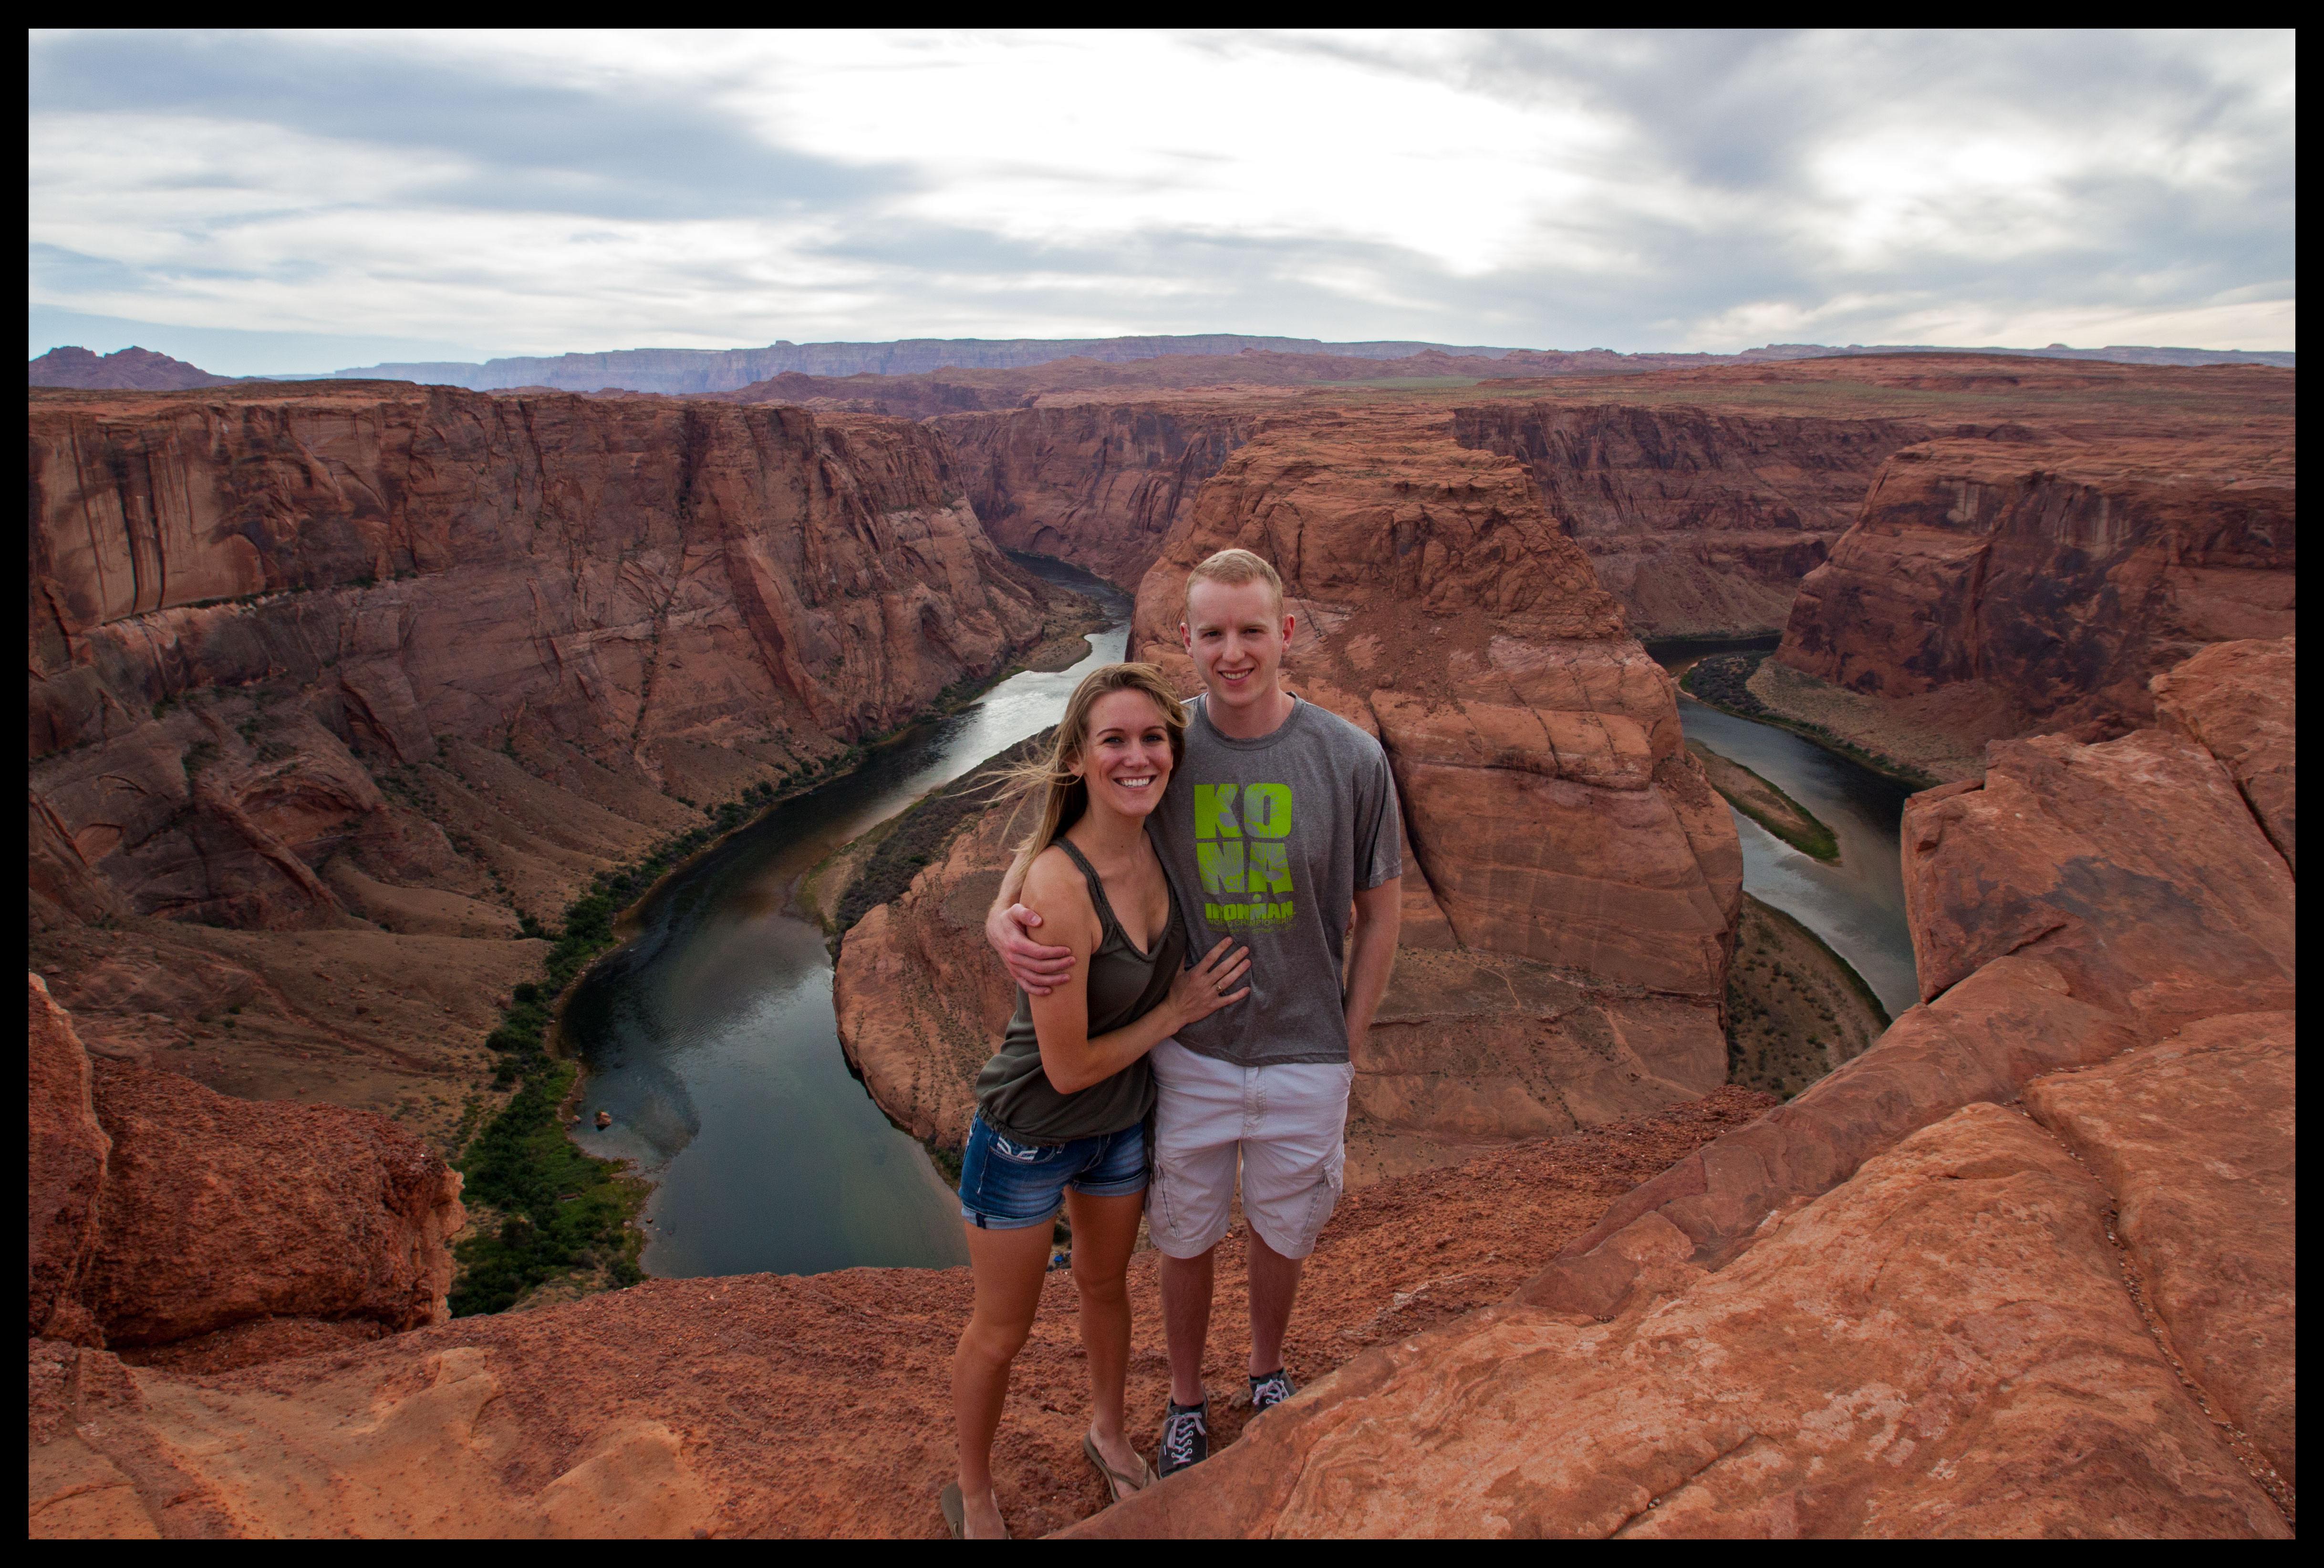
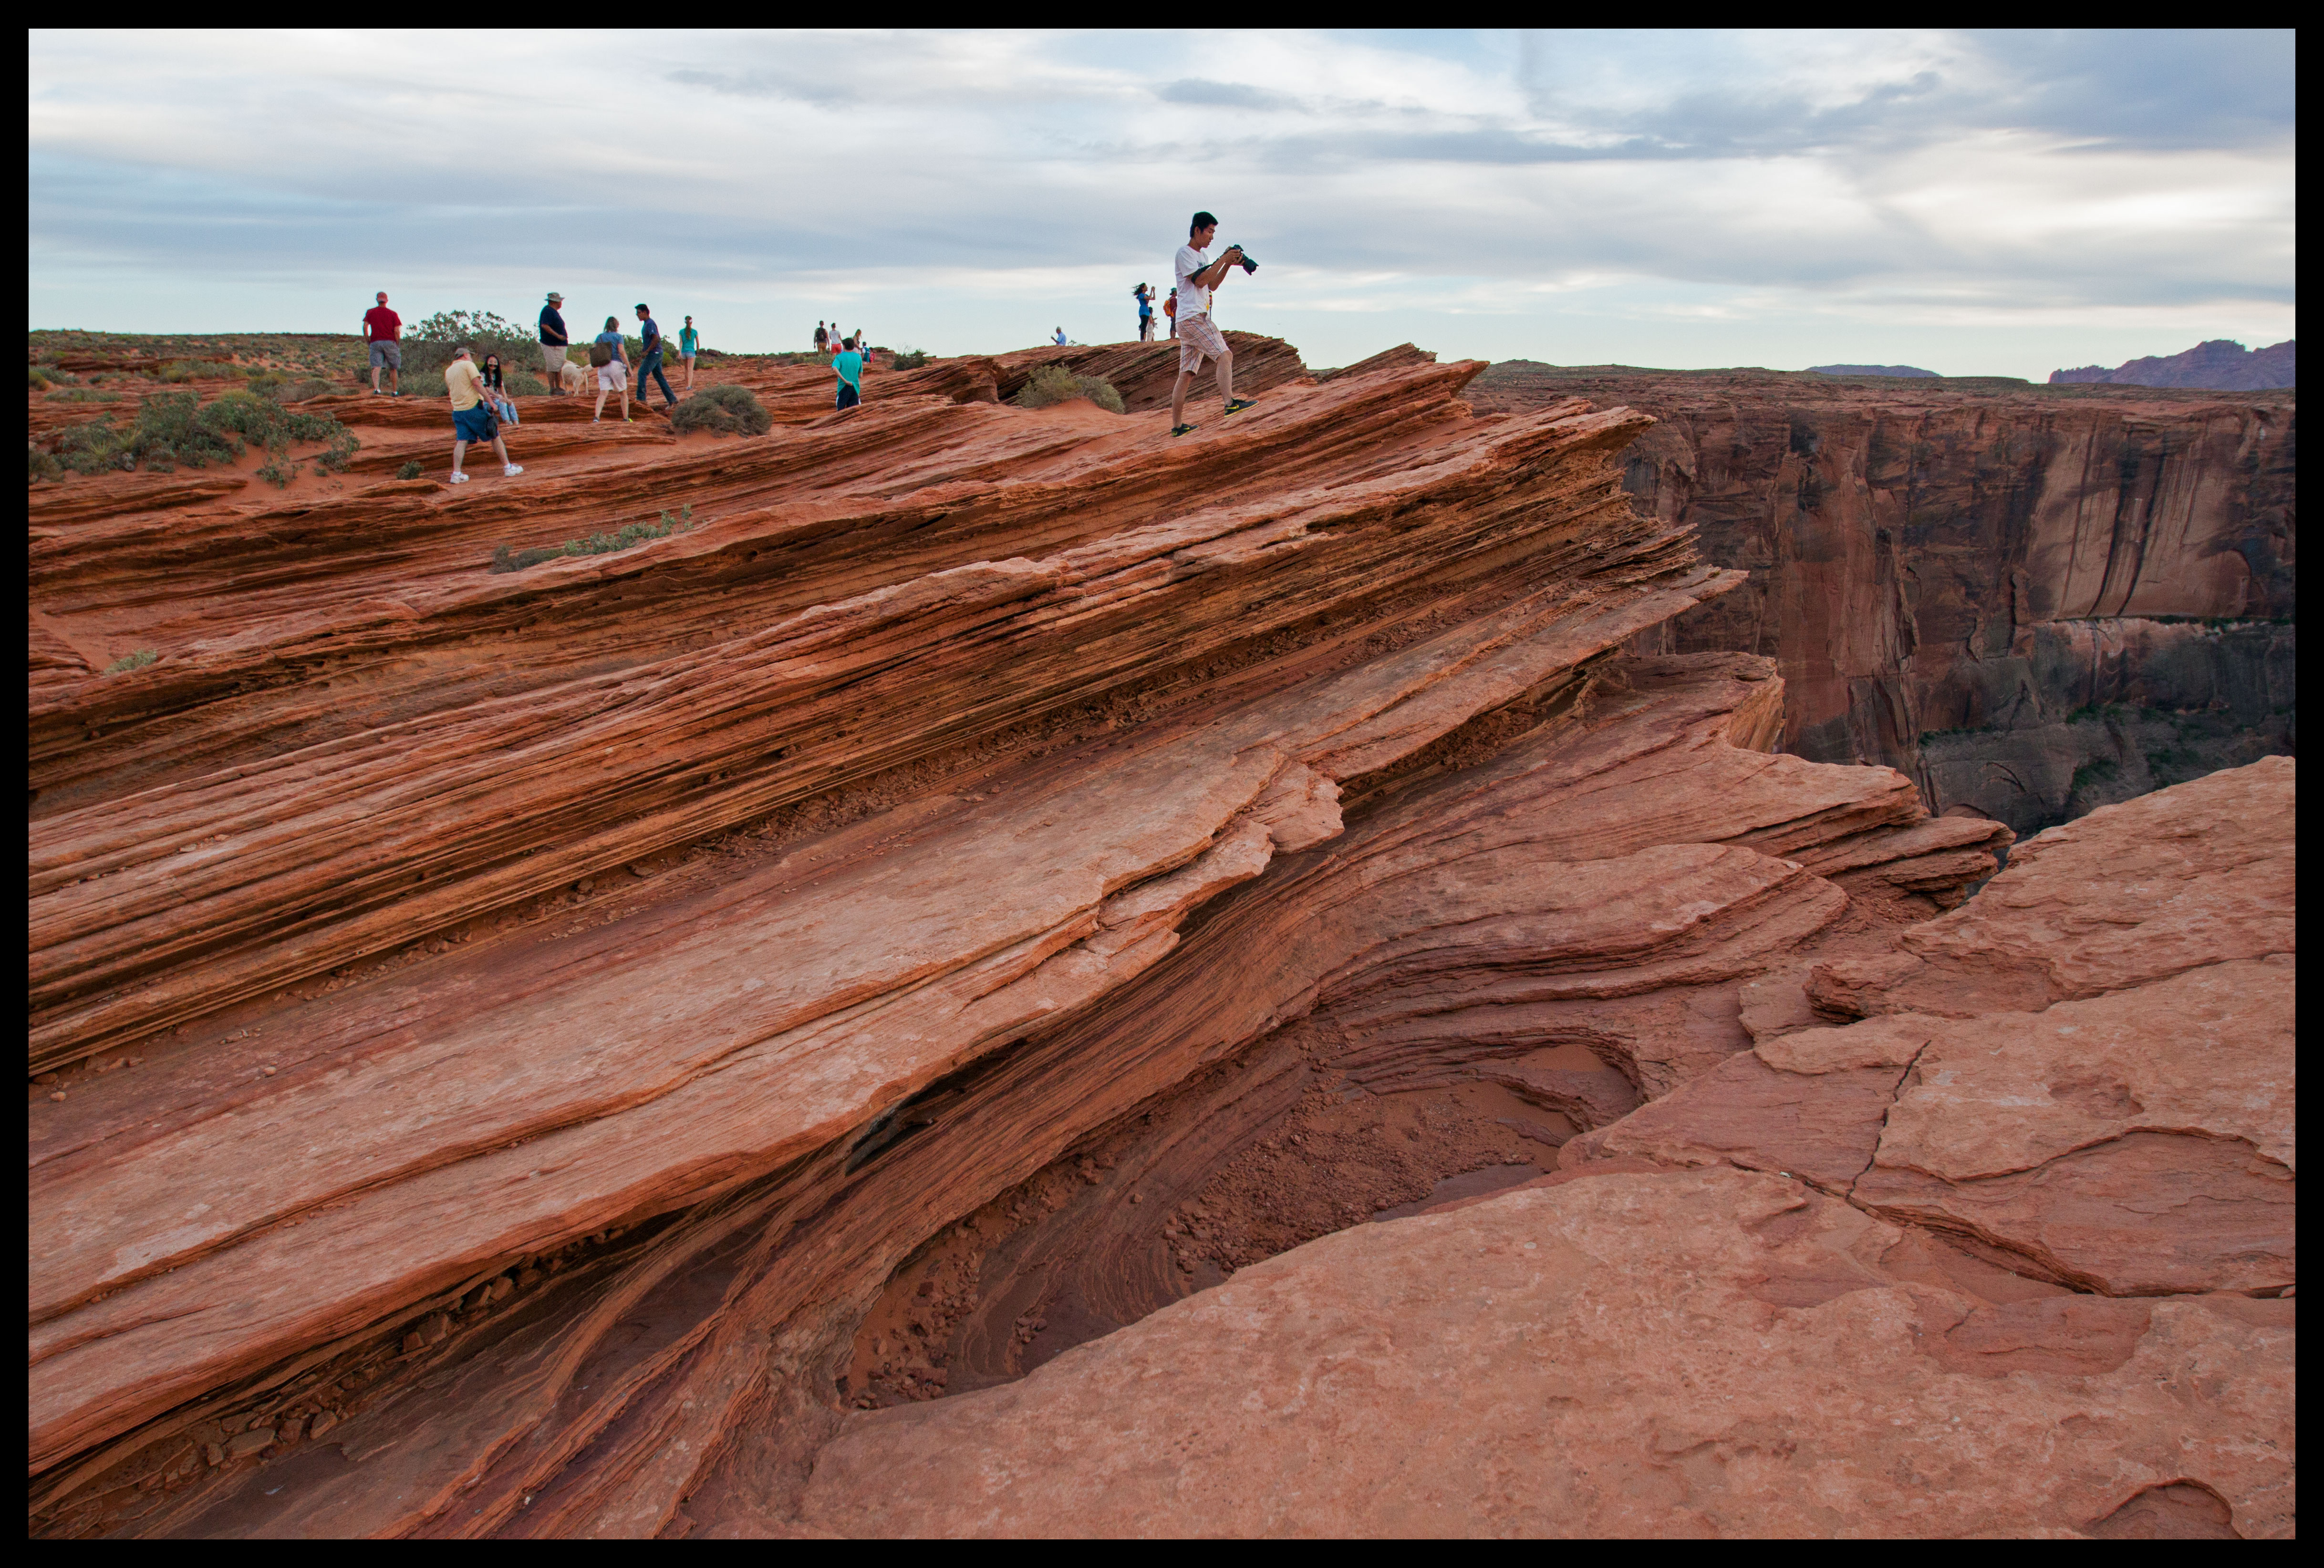
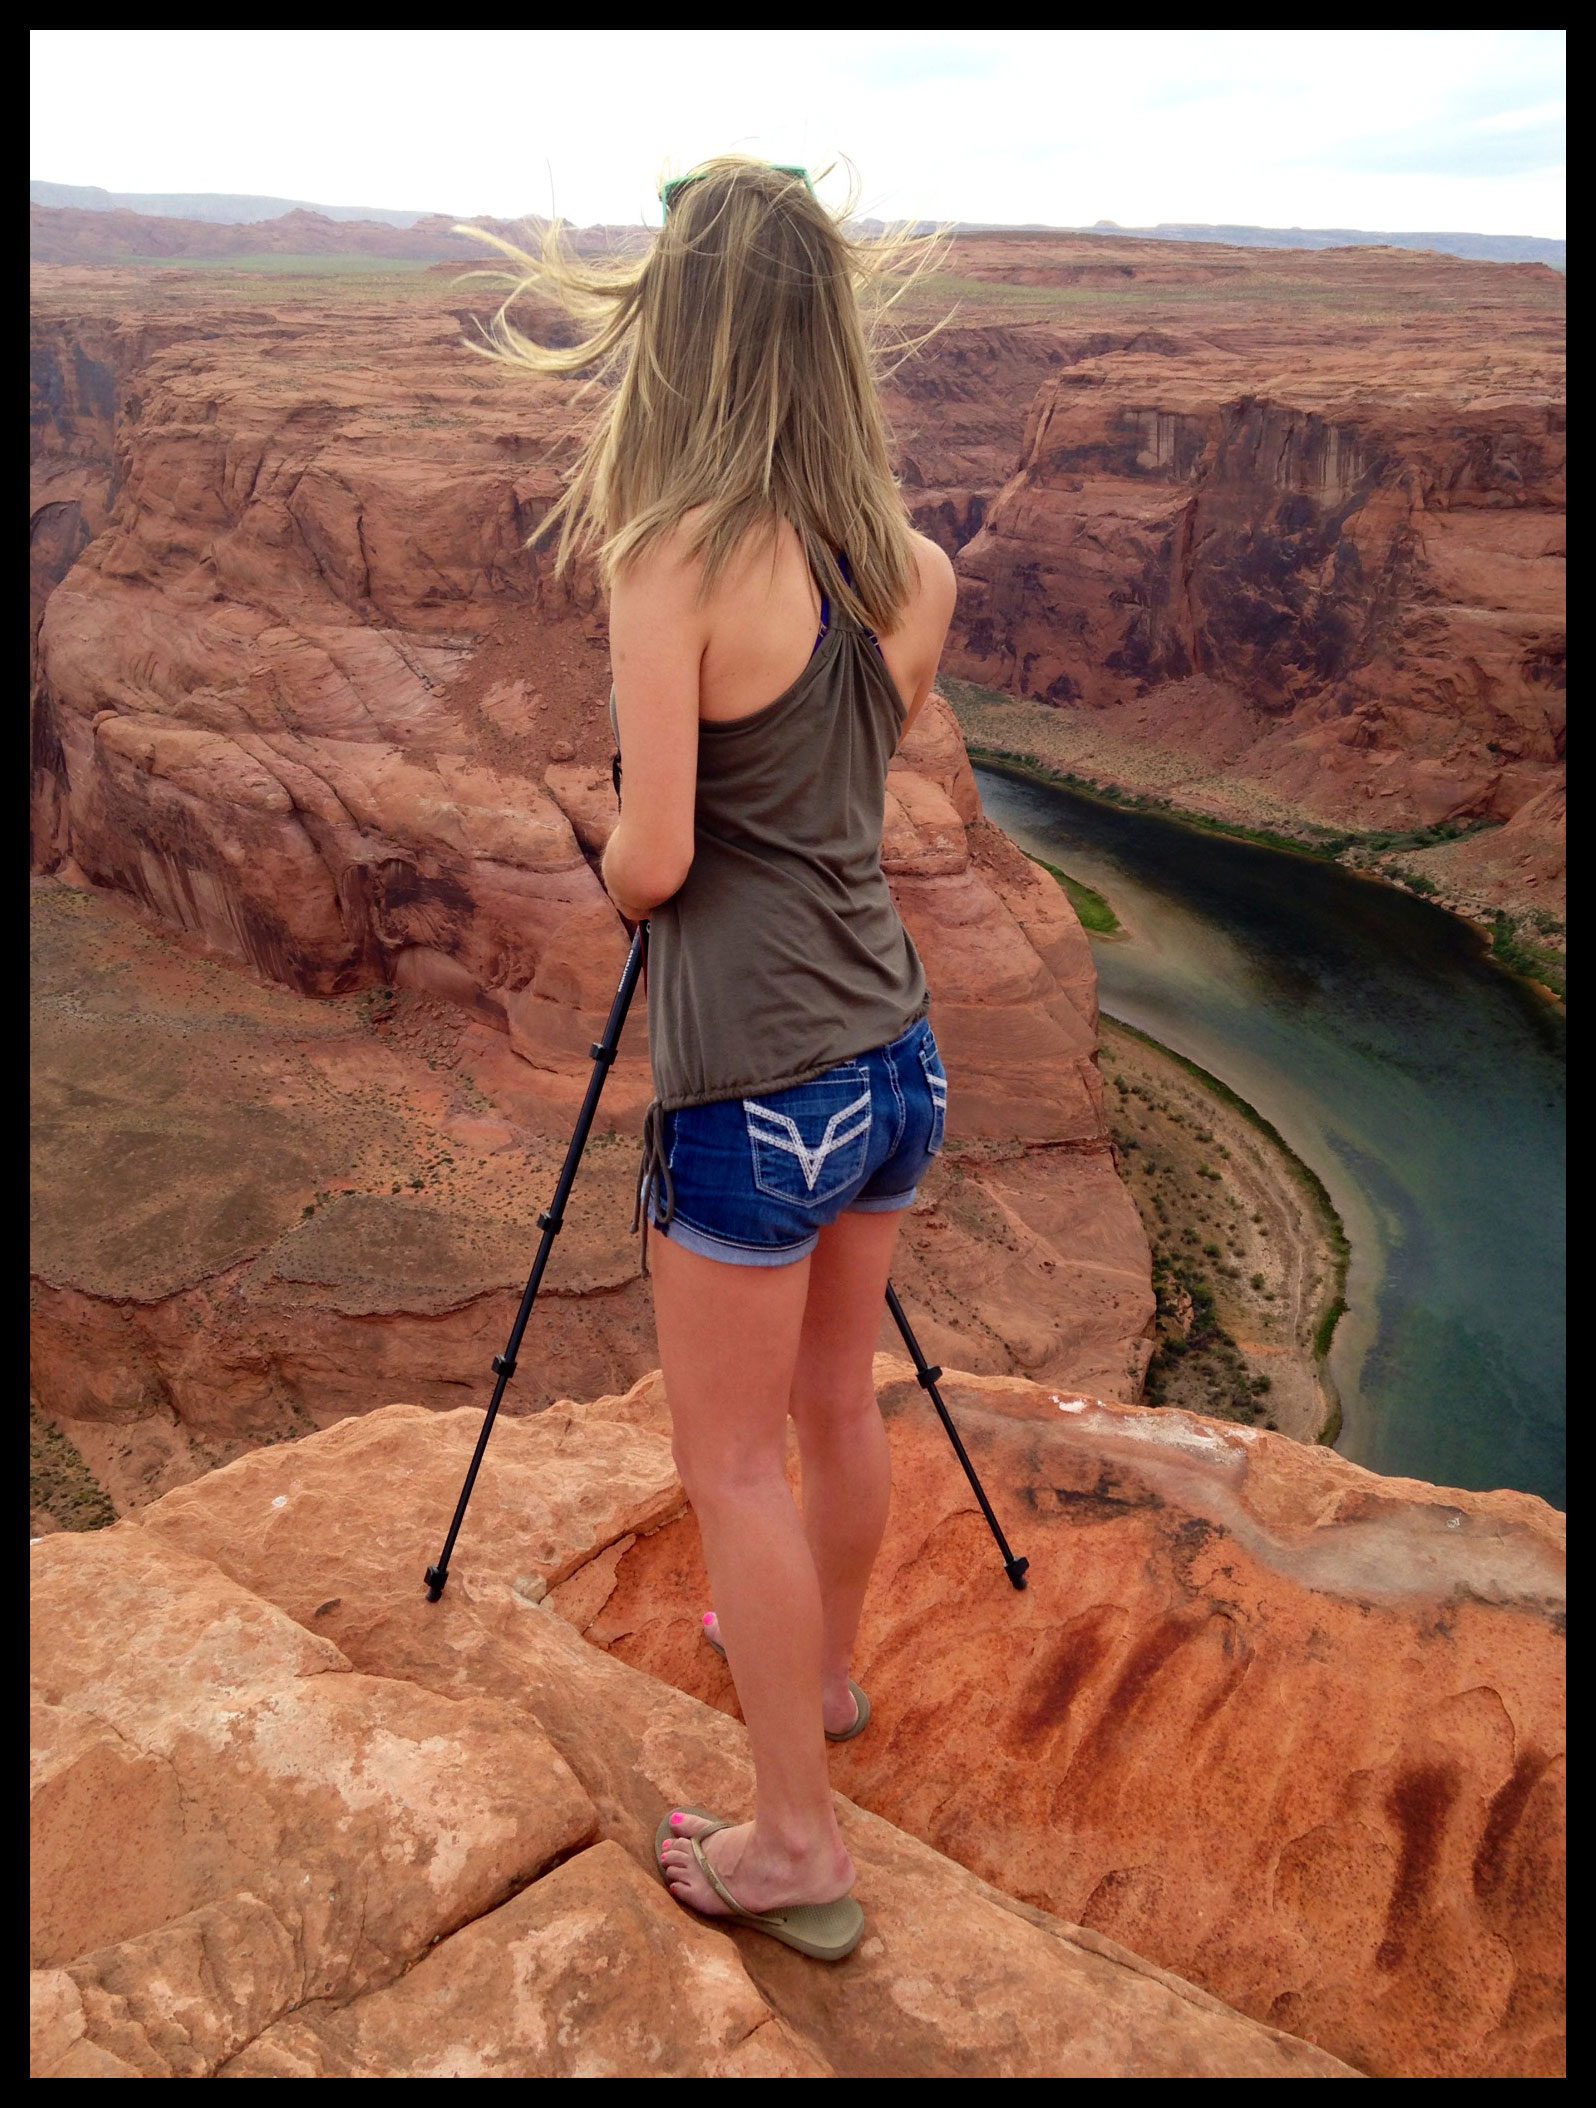
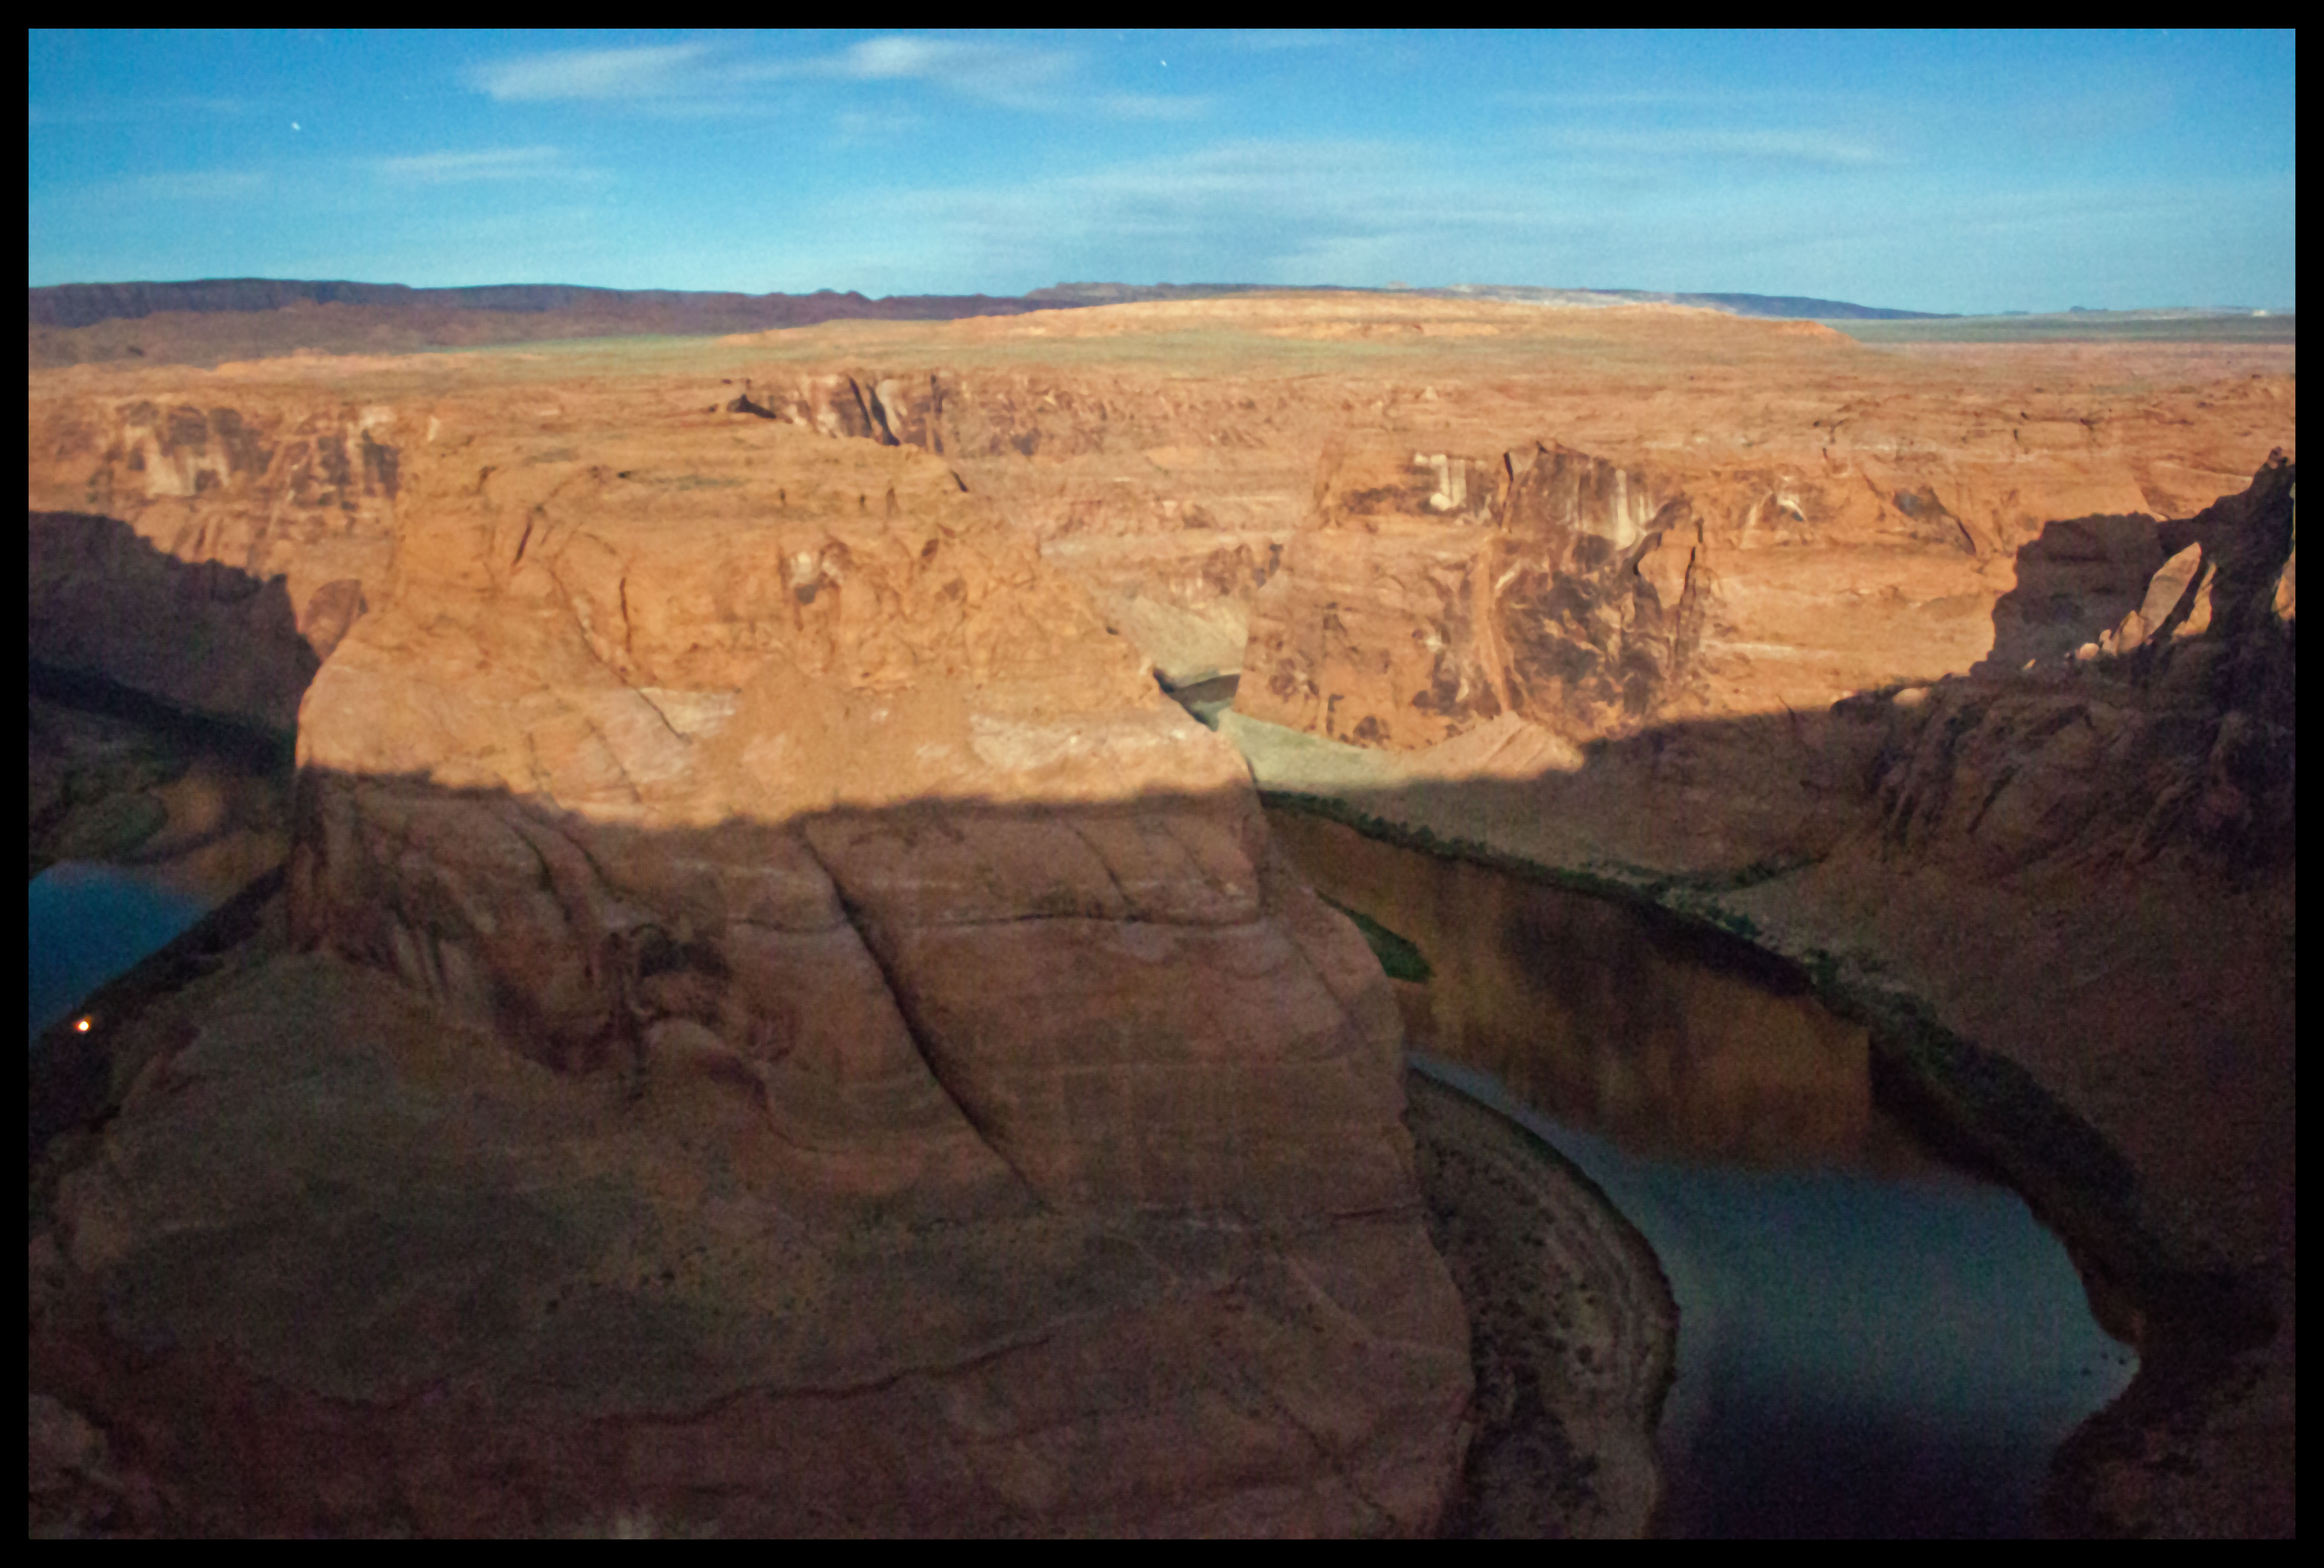
Horseshoe Bend: Absolutely free, few minutes outside of Page, geologic oddity, short hike, and expansive enough to spread out from the crowd and get great views over a couple hundred feet. What’s not to like? Right outside of Page, the Colorado River makes a complete 180 around a small section of rock, making a entirely natural and awe-inspiring horseshoe formation. We went here the evening we arrived in Page, hoping to catch a great sunset and stay until the moon rose.
The hike to Horseshoe Bend is about 3/4 of a mile from the parking lot. It goes up a short, steep hill before gradually descending to the overlook. In our rush to get out the door, I forgot to grab my sneakers and had to do it in flip flops. Since it was a combination of sand and rock, I did most of it barefoot, but you’d be better off just not forgetting your sneakers in the first place.
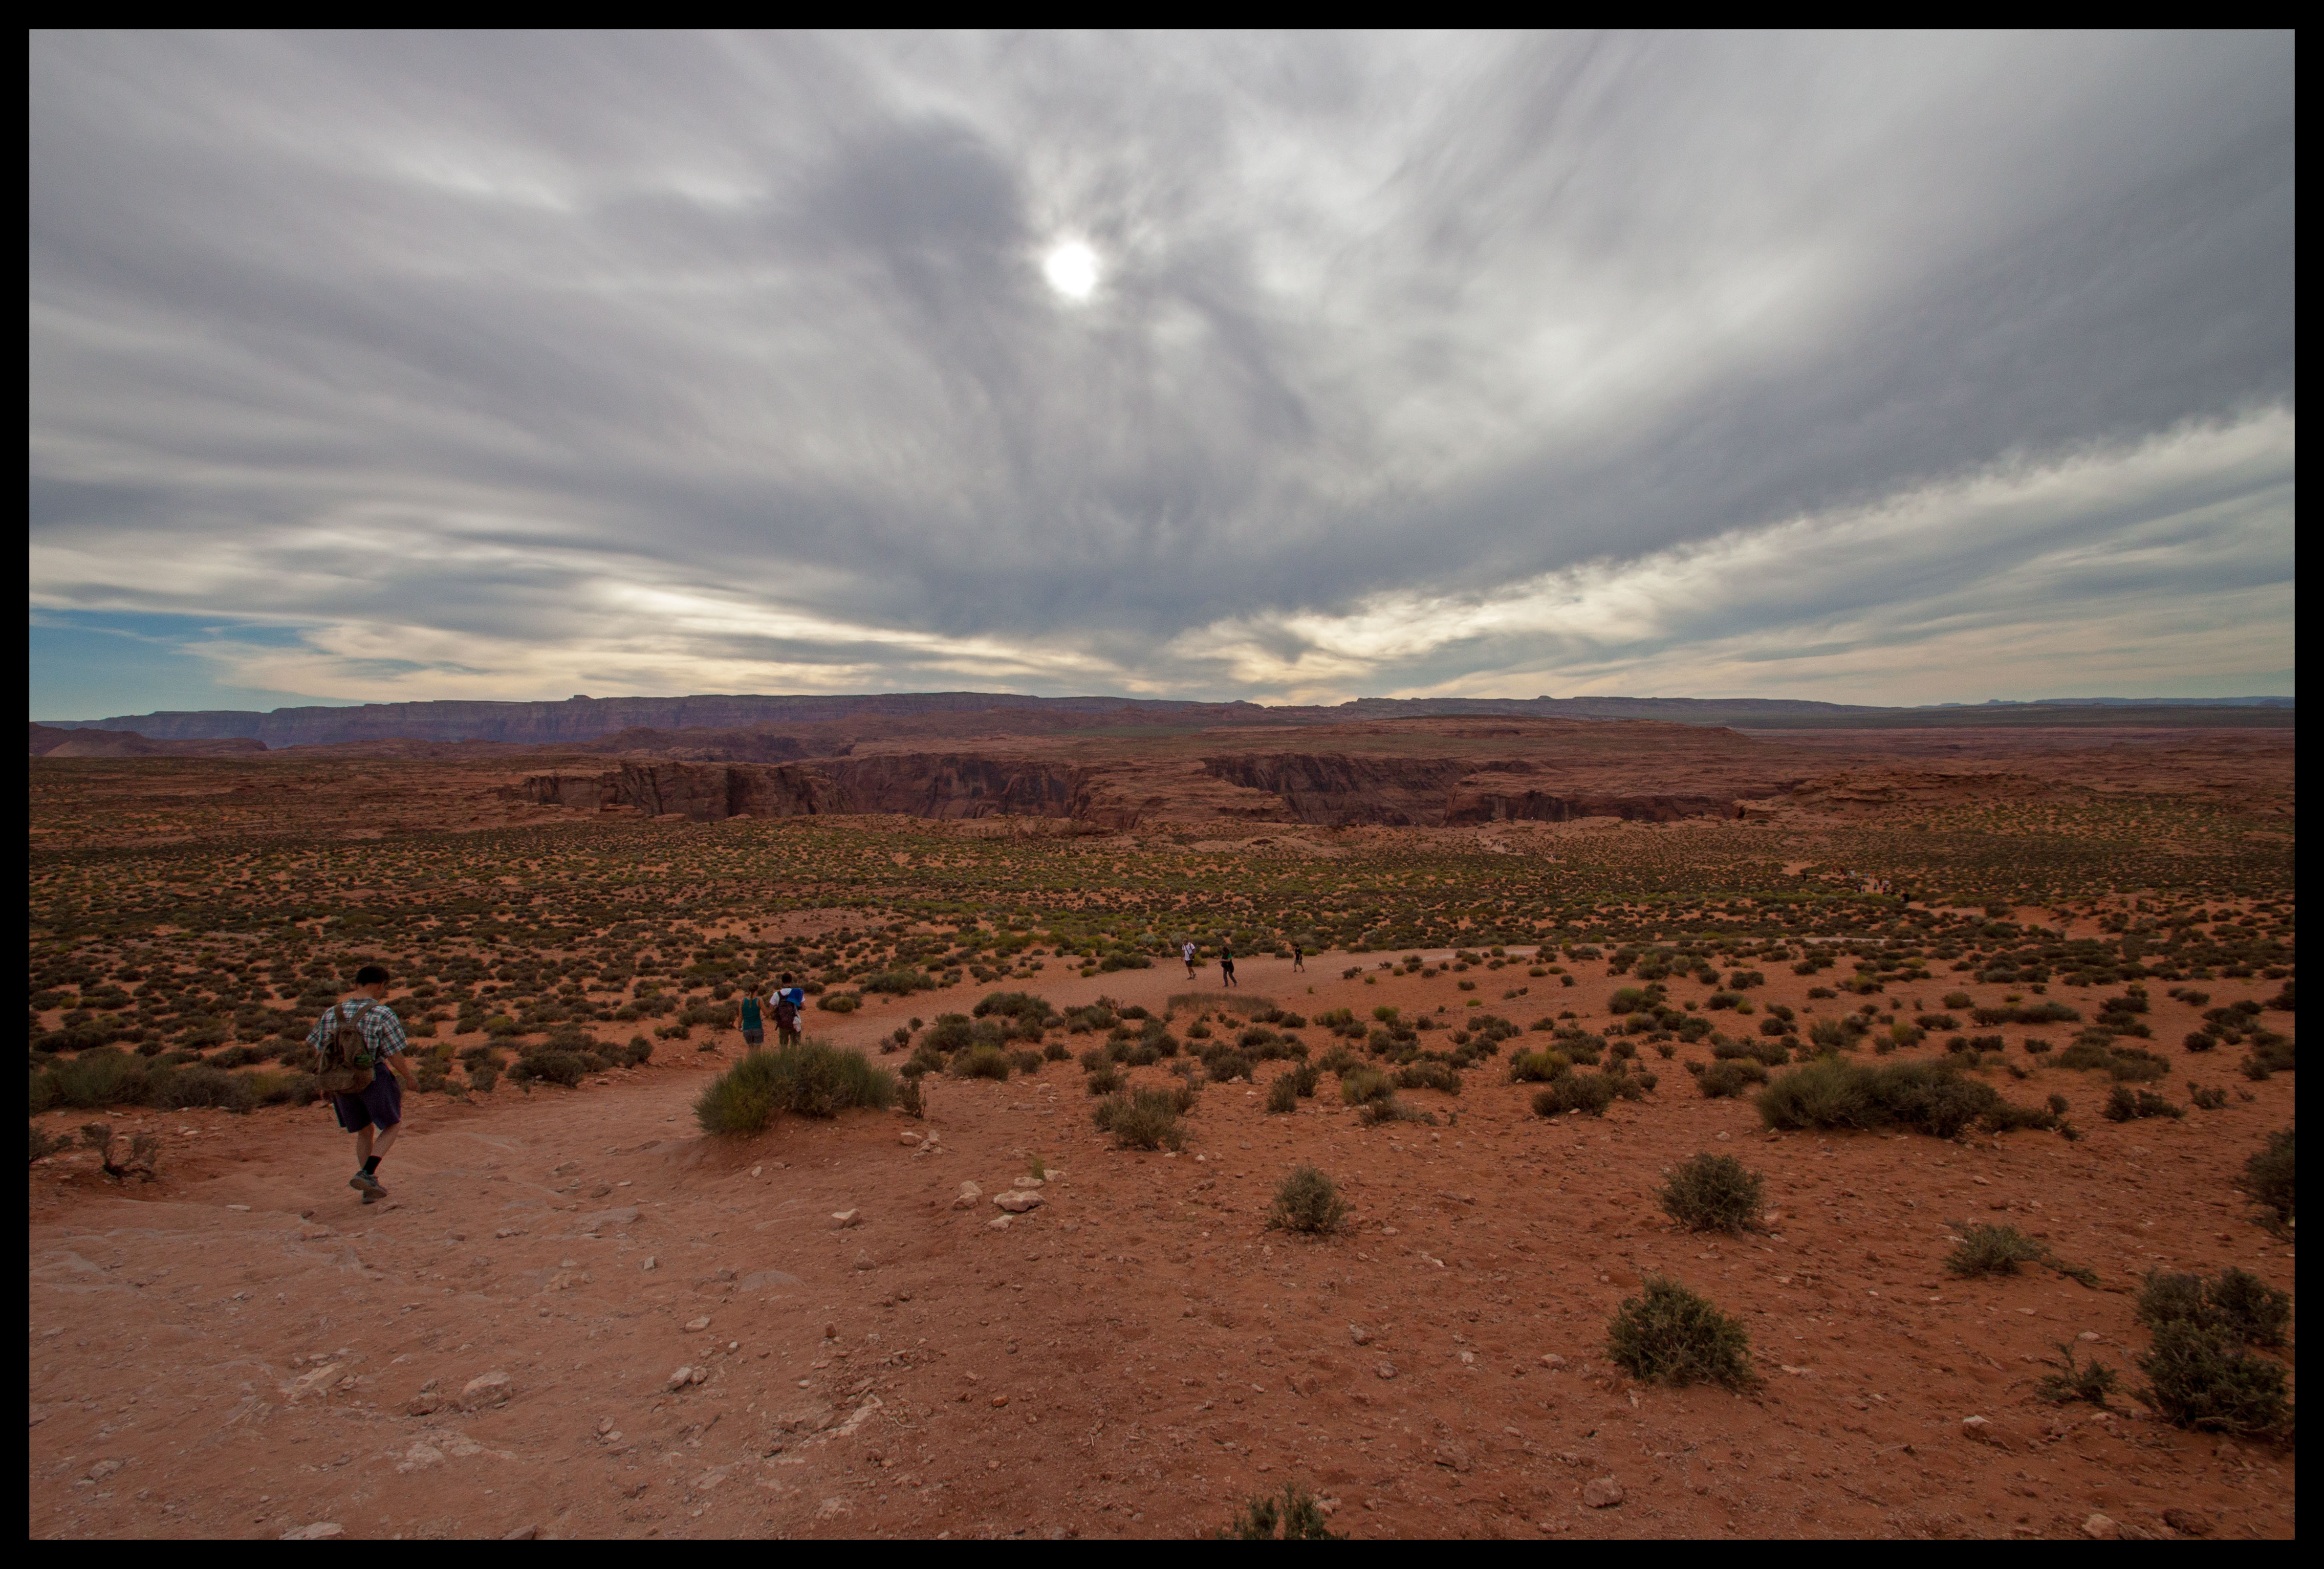
The hike to Horseshoe Bend was nice because you really can’t see the majesty of it until you’re right at the end. The lookout is expansive, so there was plenty of room to spread out from the crowds and end up with practically the same view. No one was crowding for a “front-row seat.” Our intention was to arrive for sunset; while the clouds weren’t the best-suited for that, we could still see the colors of the canyon changing with each passing moment.
There was lots to explore surrounding the overlook as well, and a couple of places to do a bit of rock climbing (not near any ledges). We probably walked a couple hundred feet to both sides of the center while we were looking for nice photo-ops.
We tried out a number of spots for photography before settling down and waiting for night to fall. Once the sun set, the site cleared out within a half hour.
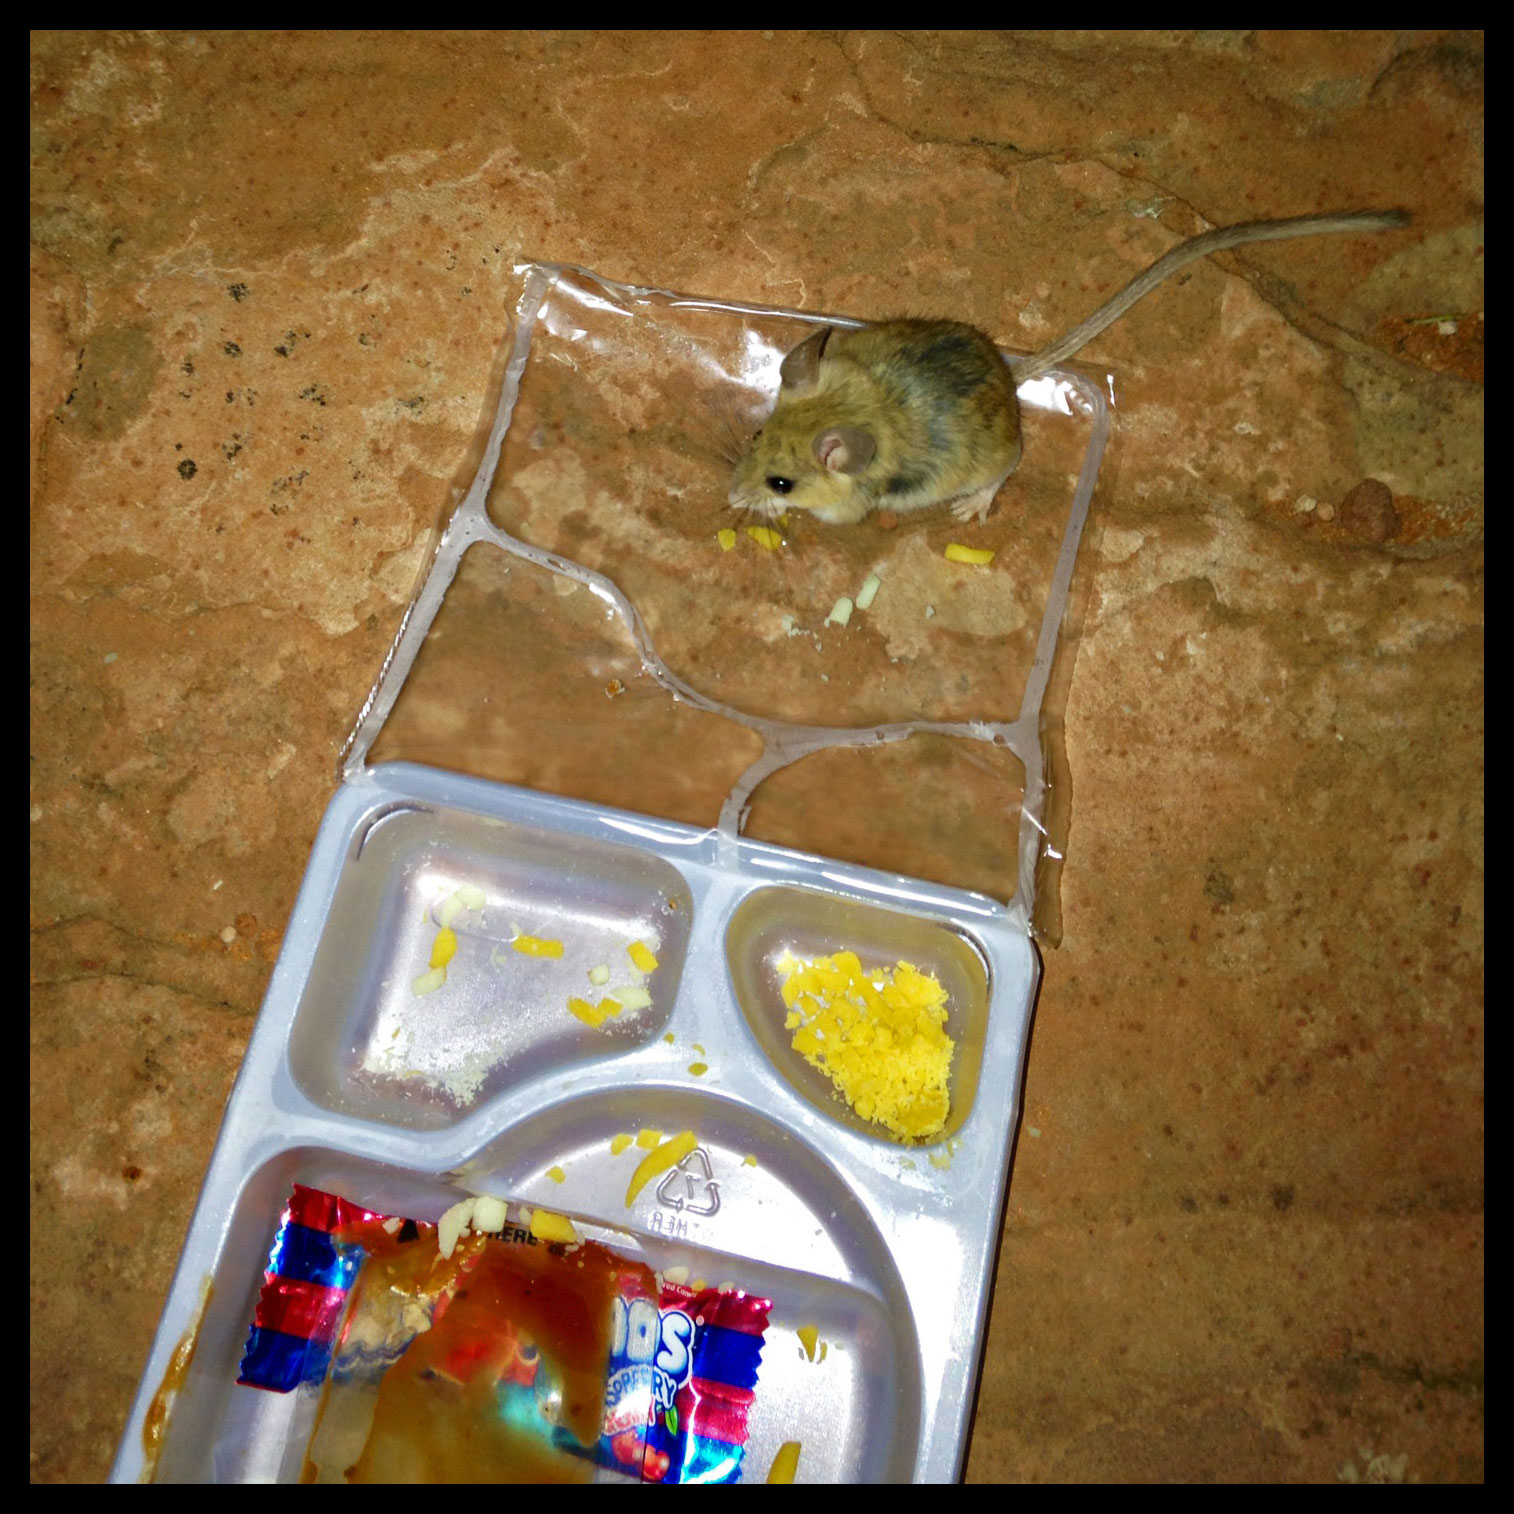
Since we were planning on staying very late, we brought all of my camera gear and a complete picnic, with dinner, drinks and snacks for later. As a side note, the site was much cleaner than expected. Guests must be good about cleaning up after themselves. Before we knew it, it was 9:00 and the moon was about to rise. As it got darker, we could see the glow from two campsites in the canyon, making us jealous of their overnight visit.
Because we were talking in our normal voices, it took a couple minutes for us to hear the squeaking noises surrounding us. Once we quieted down and got out a flashlight, we saw that we had been joined by a number of mice, popping in and out of the cracks in the rocks to sneak some dinner. We spent a good while watching them and trying to snap pictures before putting the food away for good (and checking to make sure that none of the mice had snuck into a bag when we weren’t looking).
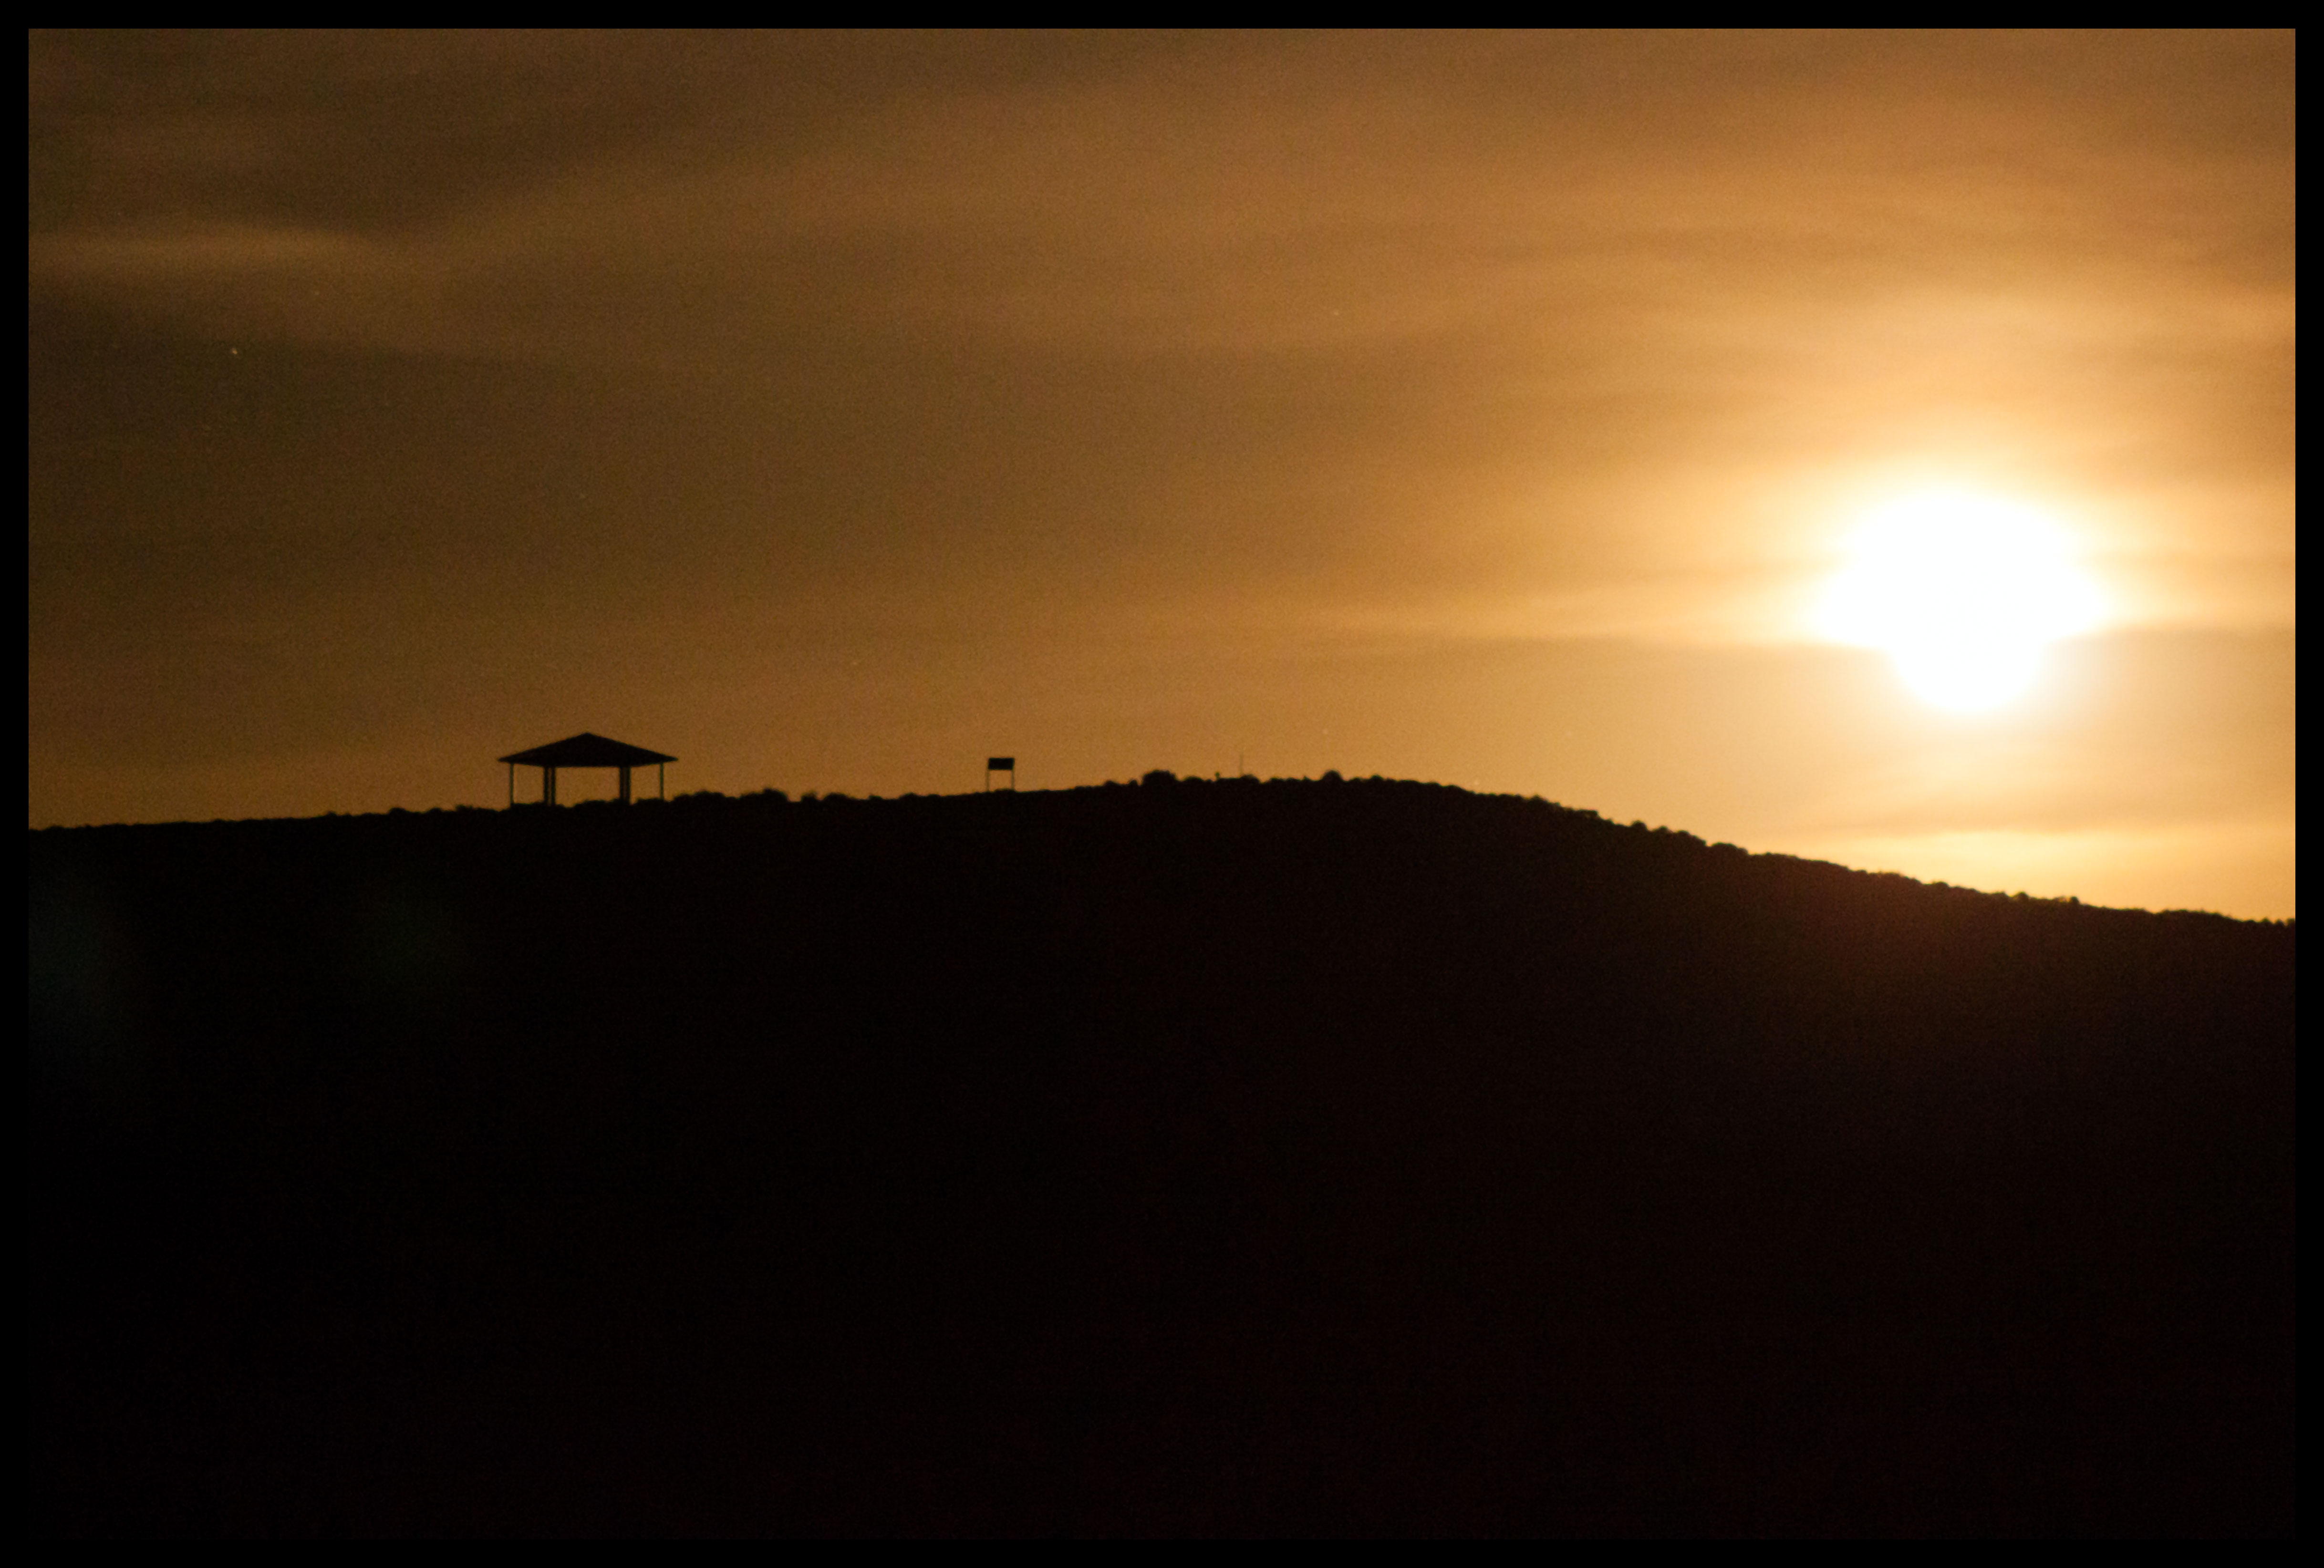
Finally, the moon rose through the clouds, nicely silhouetting the signs and along the trail back to the parking lot. Even through the clouds, the canyon was nicely illuminated by the moon as it rose higher.
As it was dark and we were the only people around, any unidentified noises were a bit spooky. We had a good 10-minute scare of hearing something rustling around in the brush that sounded much larger than a mouse. Once we got a flashlight however, we realized it was just a plastic bag caught in some branches. So the only piece of litter we saw the whole night was the one that scared us too.
Unfortunately I didn’t take into consideration how long the moon would take to rise over the canyon. At 11:00 the canyon was still less than halfway illuminated, and we were getting restless. Sometime before midnight we packed it up and headed back, since we wanted to be up early for Antelope Canyon the very next day.
If you look at the Horseshoe Bend TripAdvisor, it seems as if half of the reviews comment on how difficult the hike back to the cars is. It’s gradually uphill, and parts of it are over loose sand. I imagine doing it under the hot summer sun would exacerbate the difficulty. Whether it was because we had been hiking a lot lately or we were doing it on a cool night, neither of us had much difficulty with the hike. No matter what the time of day, you should always be carrying plenty of extra water in the desert.
Horseshoe Bend has got to be one of the most amazing things you can do completely free in the state of Arizona. (If I was making my own list, seeing the our dark night skies would also be on there.) Of 2127 reviews on TripAdvisor, 98% rank Horseshoe Bend as 4 stars or higher and I would have to agree. This was a spectacular way to start our visit to Page.
Antelope Canyon
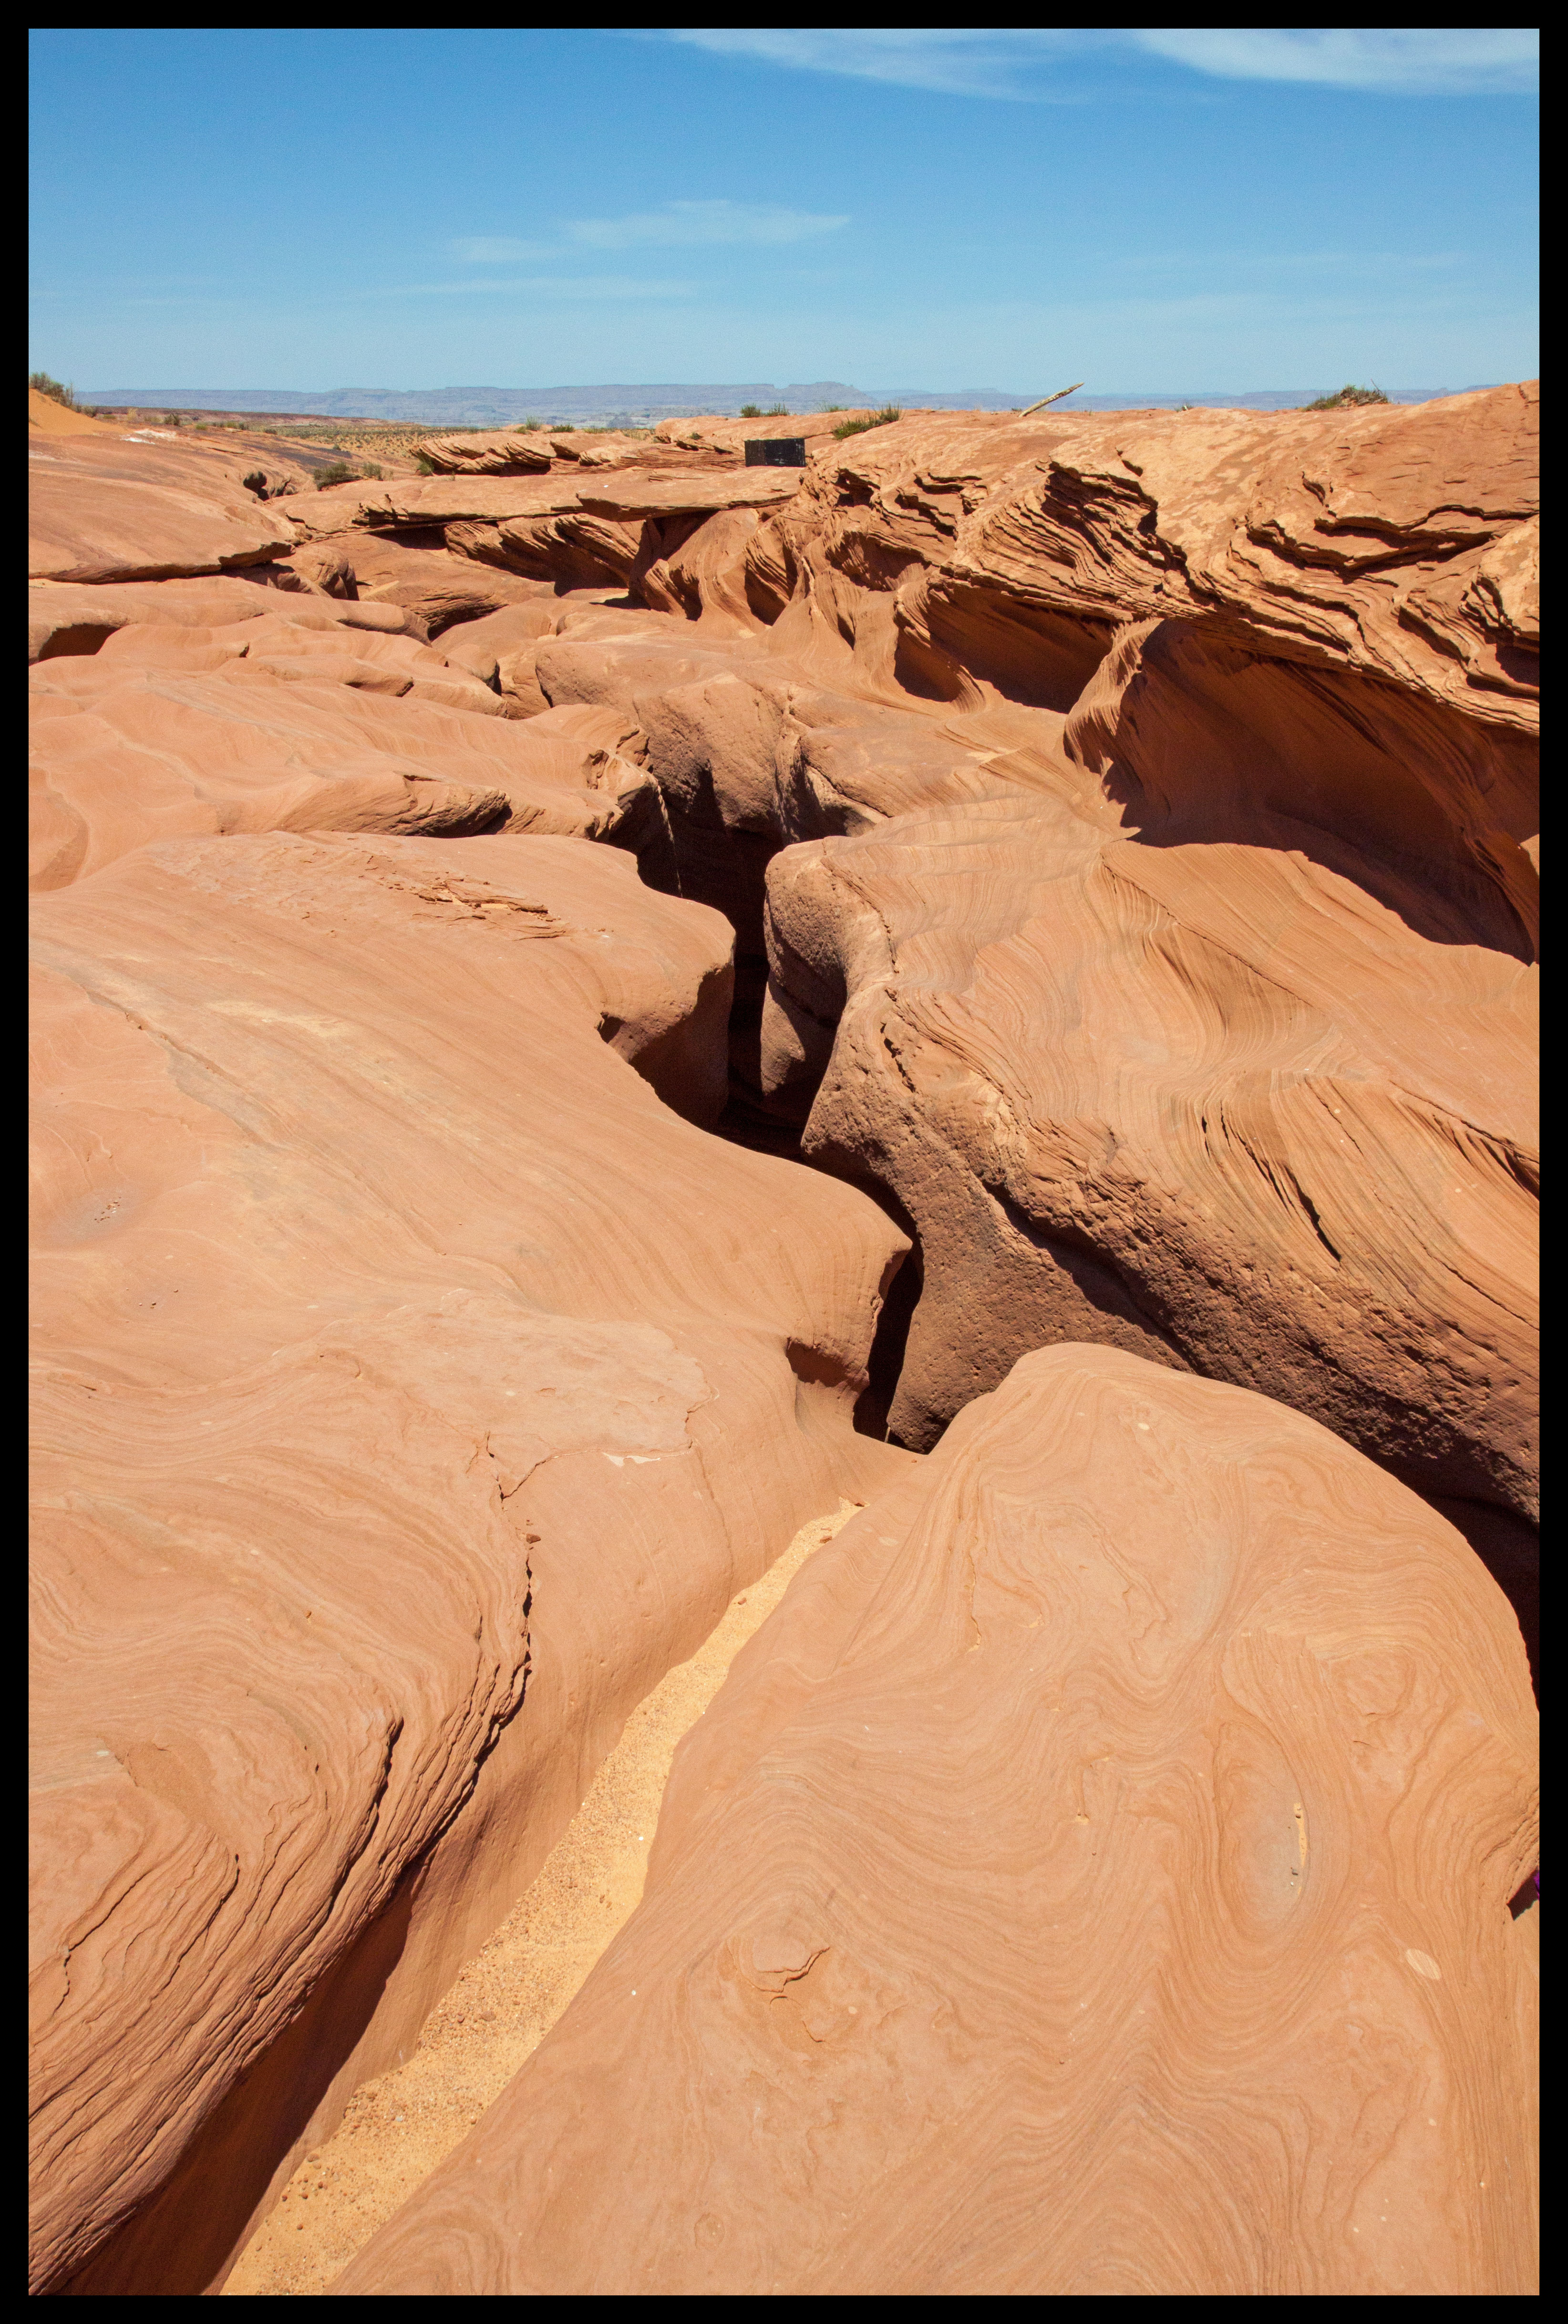
Antelope Canyon was our driving force toward visiting Page. After seeing one too many gorgeous pictures of this place online, I decided we had to go. This is one of many slot canyons found in the Page area, formed by erosive floodwater carving away soft, sandstone rock. The geologic processes are ongoing, and the canyons are closed to visitors when heavy rains or flooding are expected.
The attraction is really composed of two parts: Lower Antelope Canyon and Upper Antelope Canyon. The only way to access them is on a guided tour through several Navajo operations in the area. The number of companies offering tours was a bit overwhelming, and we almost ended up visiting Upper Antelope Canyon for a photography tour. However, Yelp reviews leaned strongly toward Lower Antelope Canyon, which was less crowded, cheaper and apparently more beautiful. We ended up doing Ken’s Guided Tours, but buying photography passes for a bit extra. These passes allowed you to wander the canyon without a guide for two hours, rather than stay with a tour for 1:15. To get a pass, you had to have a DSLR camera and tripod (each person in the party).
If you’re not planning on visiting, you can skip the complaints below and just look at the pictures.
Complaint 1: Honestly, buying the photographer’s pass was a colossal waste of money. The tours were so crowded and the pathways so narrow that it was impossible to separate from a group or set up any shots without people in them. Notice that the vast majority of the photos below are looking up. We couldn’t even squeeze past groups, as much of the walking was single-file. When all was said and done, it took us about 1:30 just to walk through the canyon end-to-end. By the time we finished, we were too exasperated to go back and take more photos, and there would have been more tour groups coming through anyway. It seemed like a huge rip-off for them to sell those passes knowing how crowded the canyon already was. We also had two guides tell us to go off-route for some cool sights, and another guide get upset with us for doing so, so plenty of mixed messages there.
Complaint 2: Although we weren’t sticking with one specific group, I could tell that the guides were rushed to finish as well. I saw a couple of groups toward the end get their tour cut short in order to leave the canyon within 1:15, meaning they missed some of the best sights toward the end. That being said, the guides were friendly and seemed to enjoy their jobs. They were knowledgable and took the time to help guests get their pictures exactly right.
Complaint/Suggestion 3: I honestly can’t imagine how Lower Antelope Canyon could be any less crowded than Upper Antelope Canyon. Maybe the views are better, but I wouldn’t suggest just choosing LAC on the basis of avoiding crowds.
Now, aside from all of the complaining, it really was a beautiful sight. I’m not sure if I’d go again, but it was definitely an amazing experience. Reviews online disagreed on the best time of day to visit, suggesting anywhere from 8:00am to noon. We split that down the middle and arrived around 10:30. One of the guides told us later on that her favorite time of day to walk through the canyon was in the extreme early morning.
Finally, pictures.

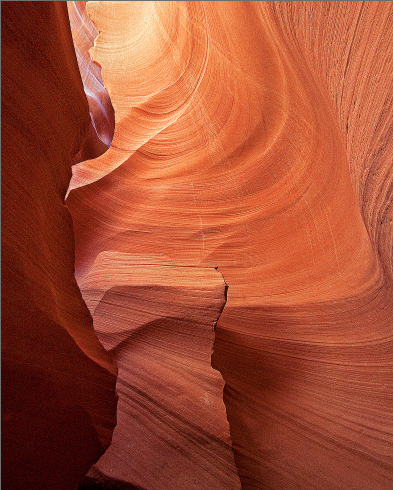
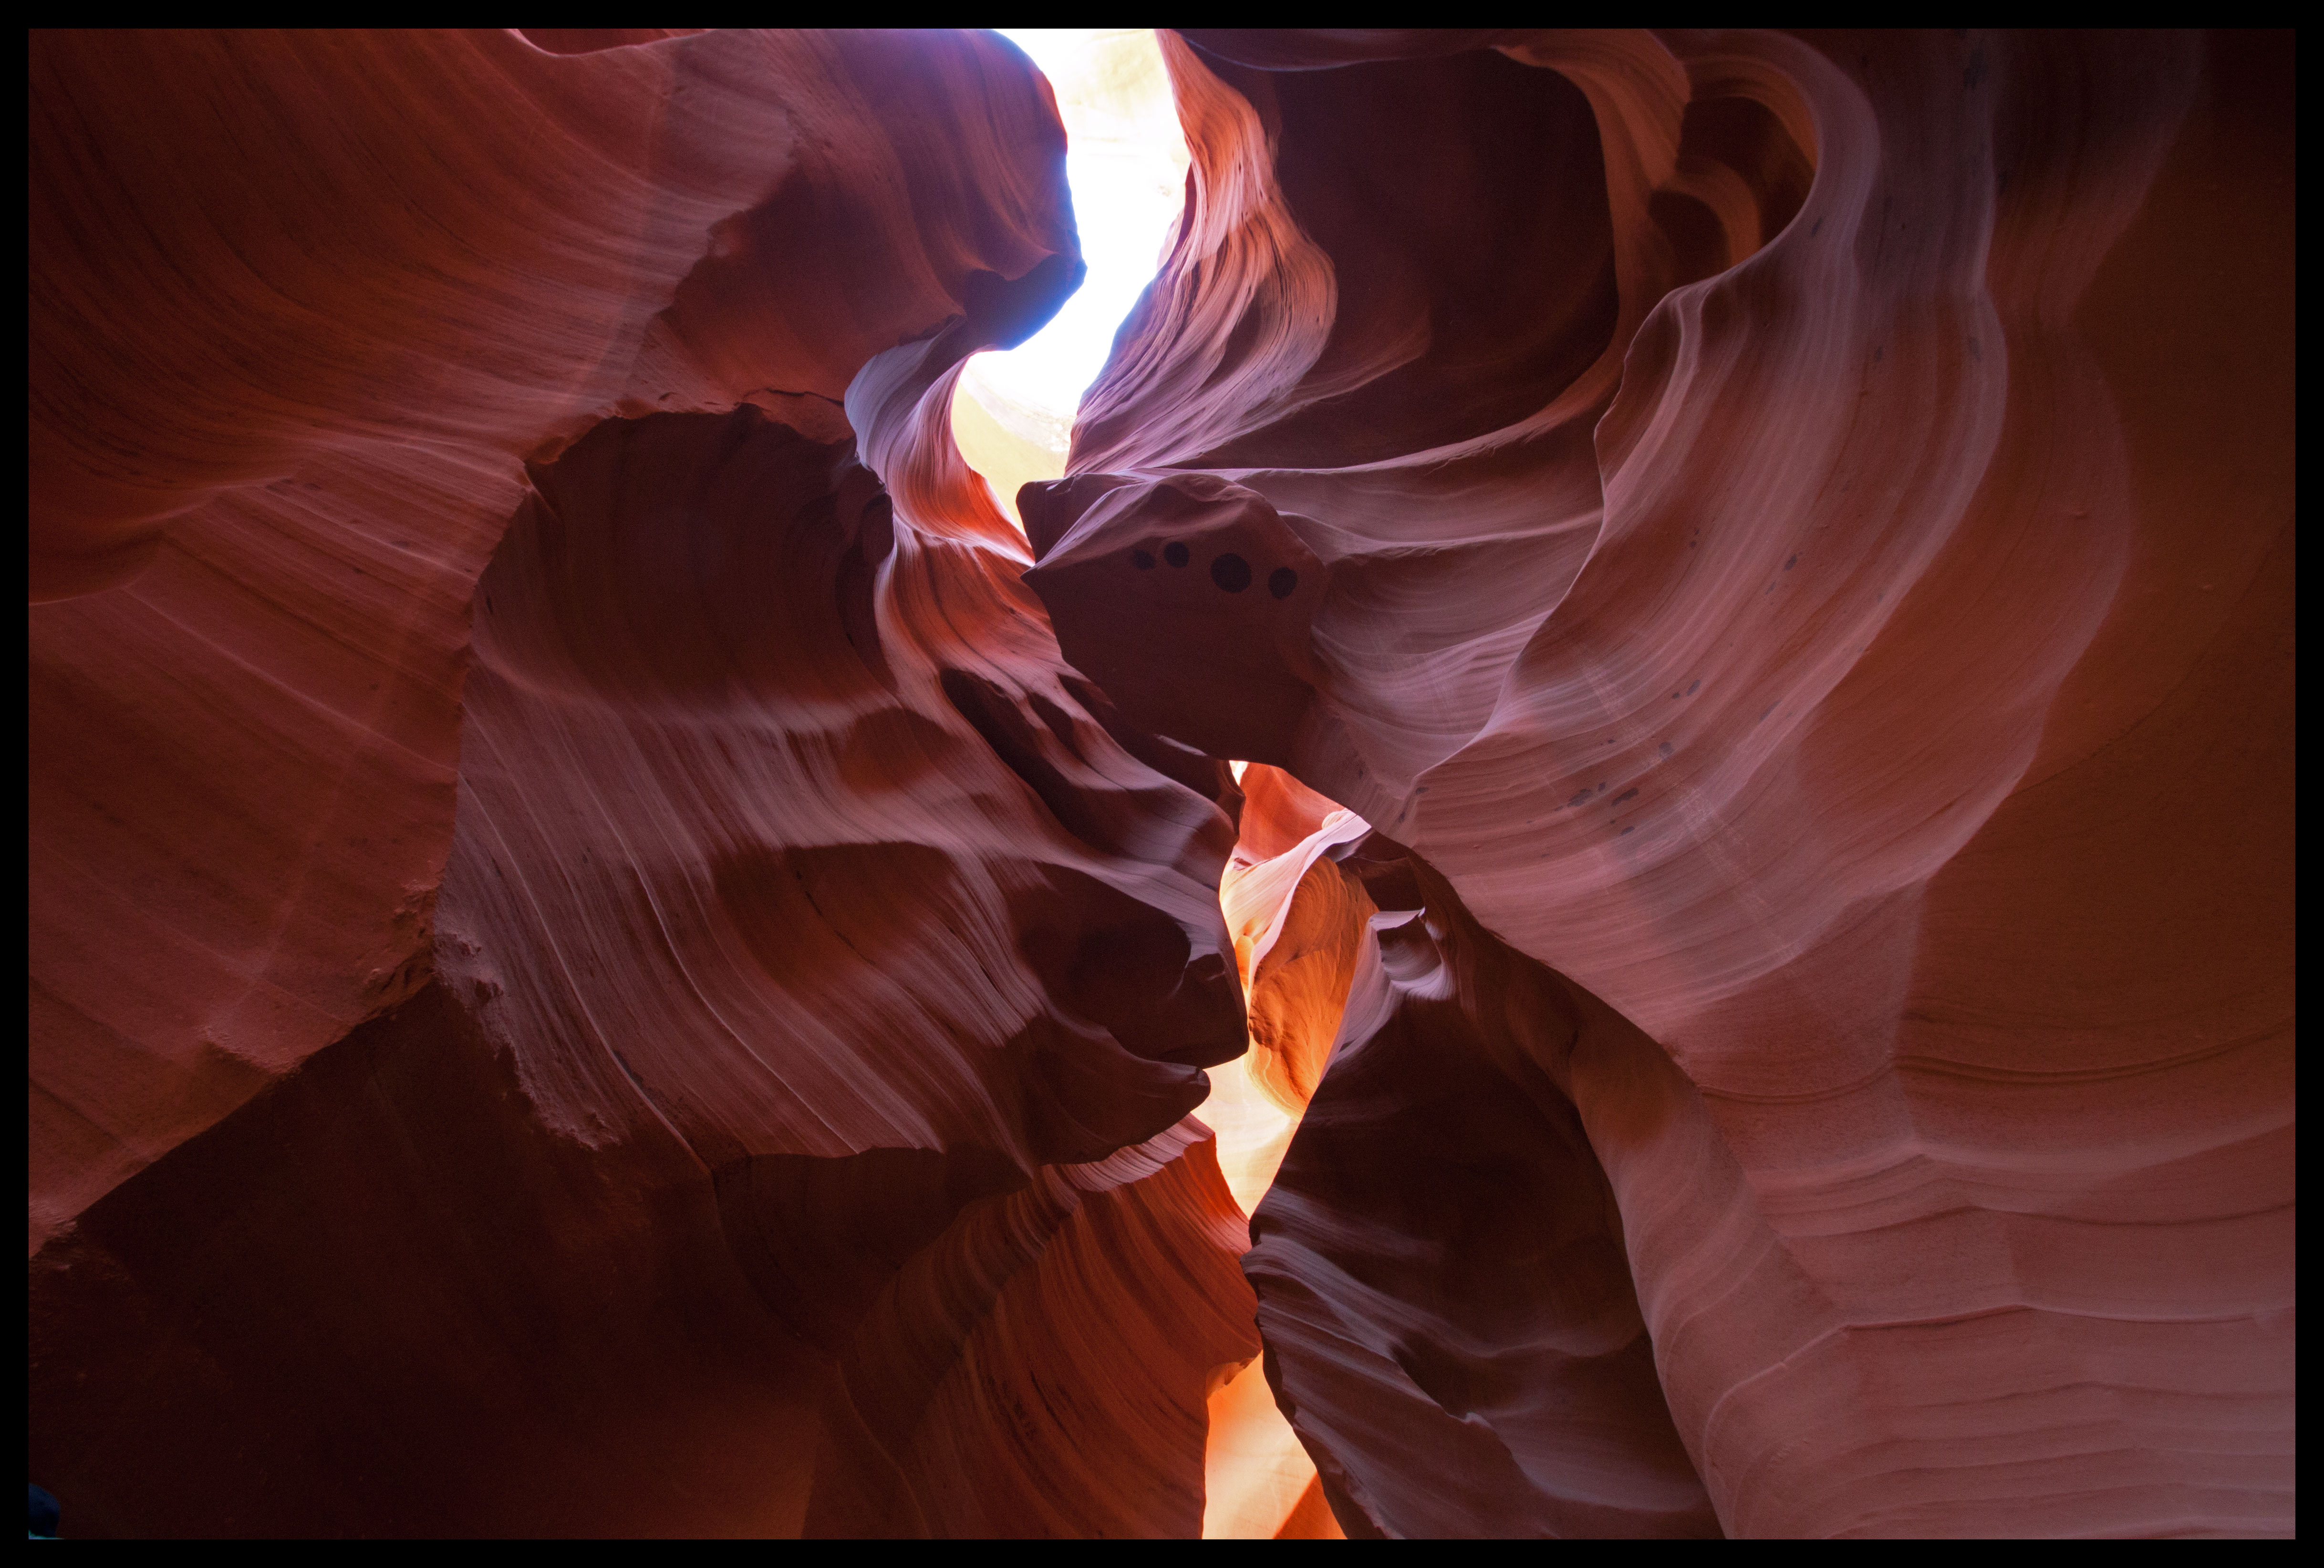
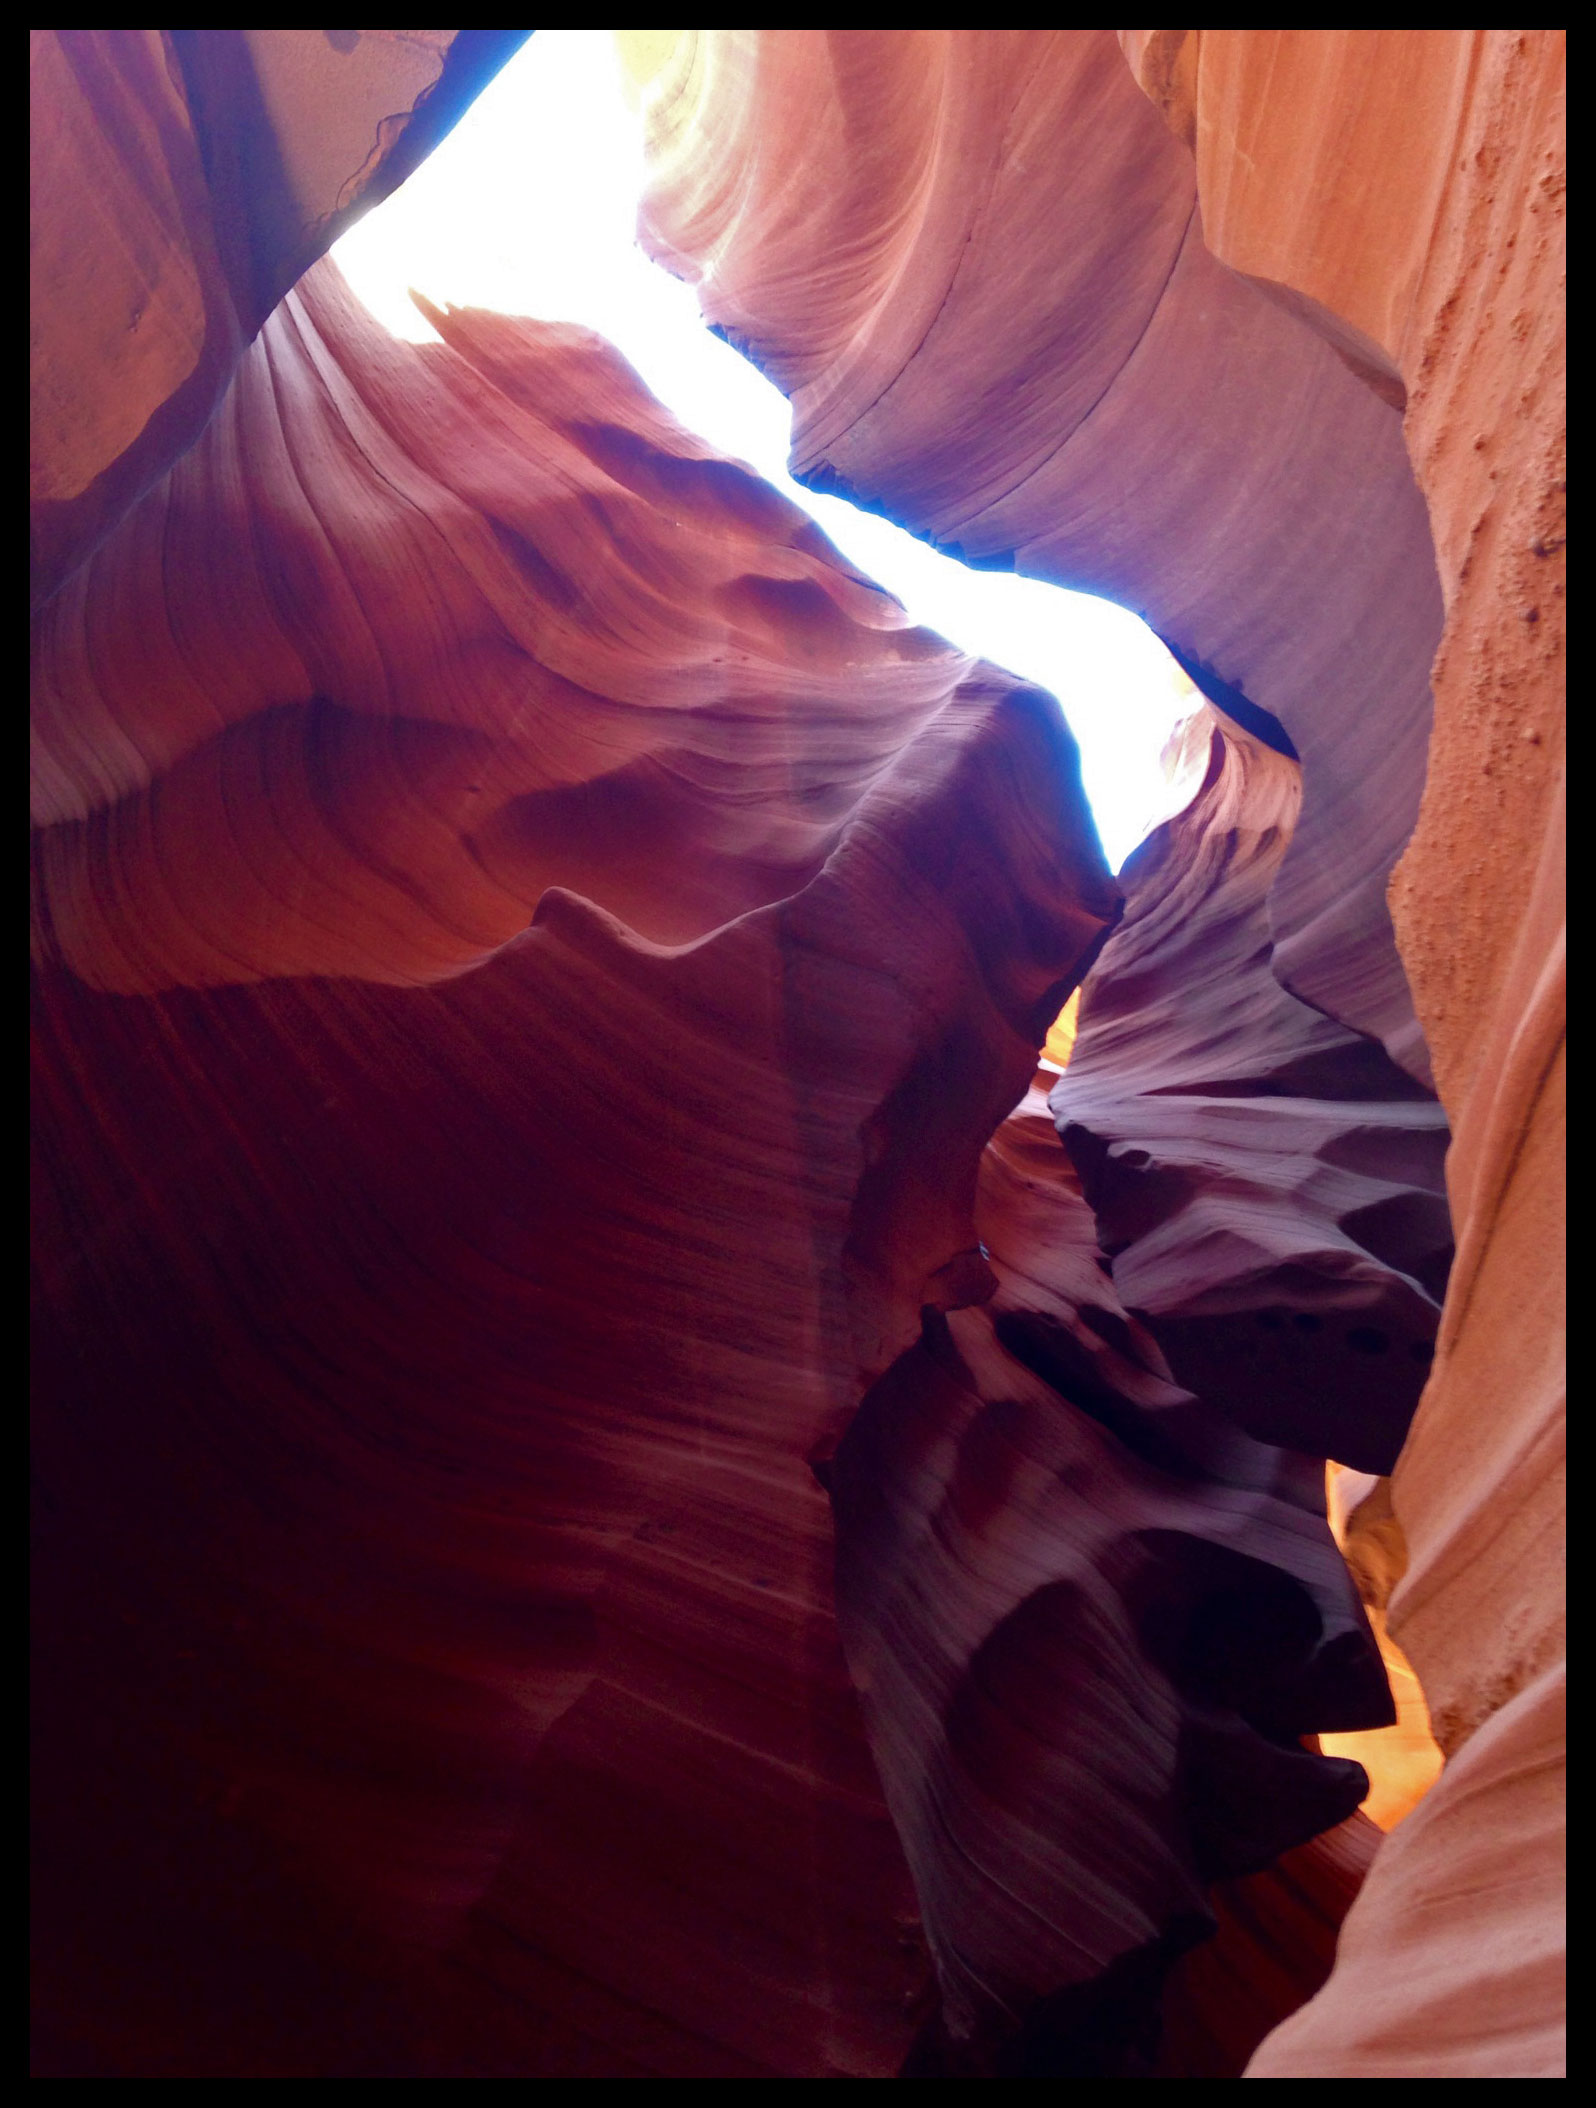
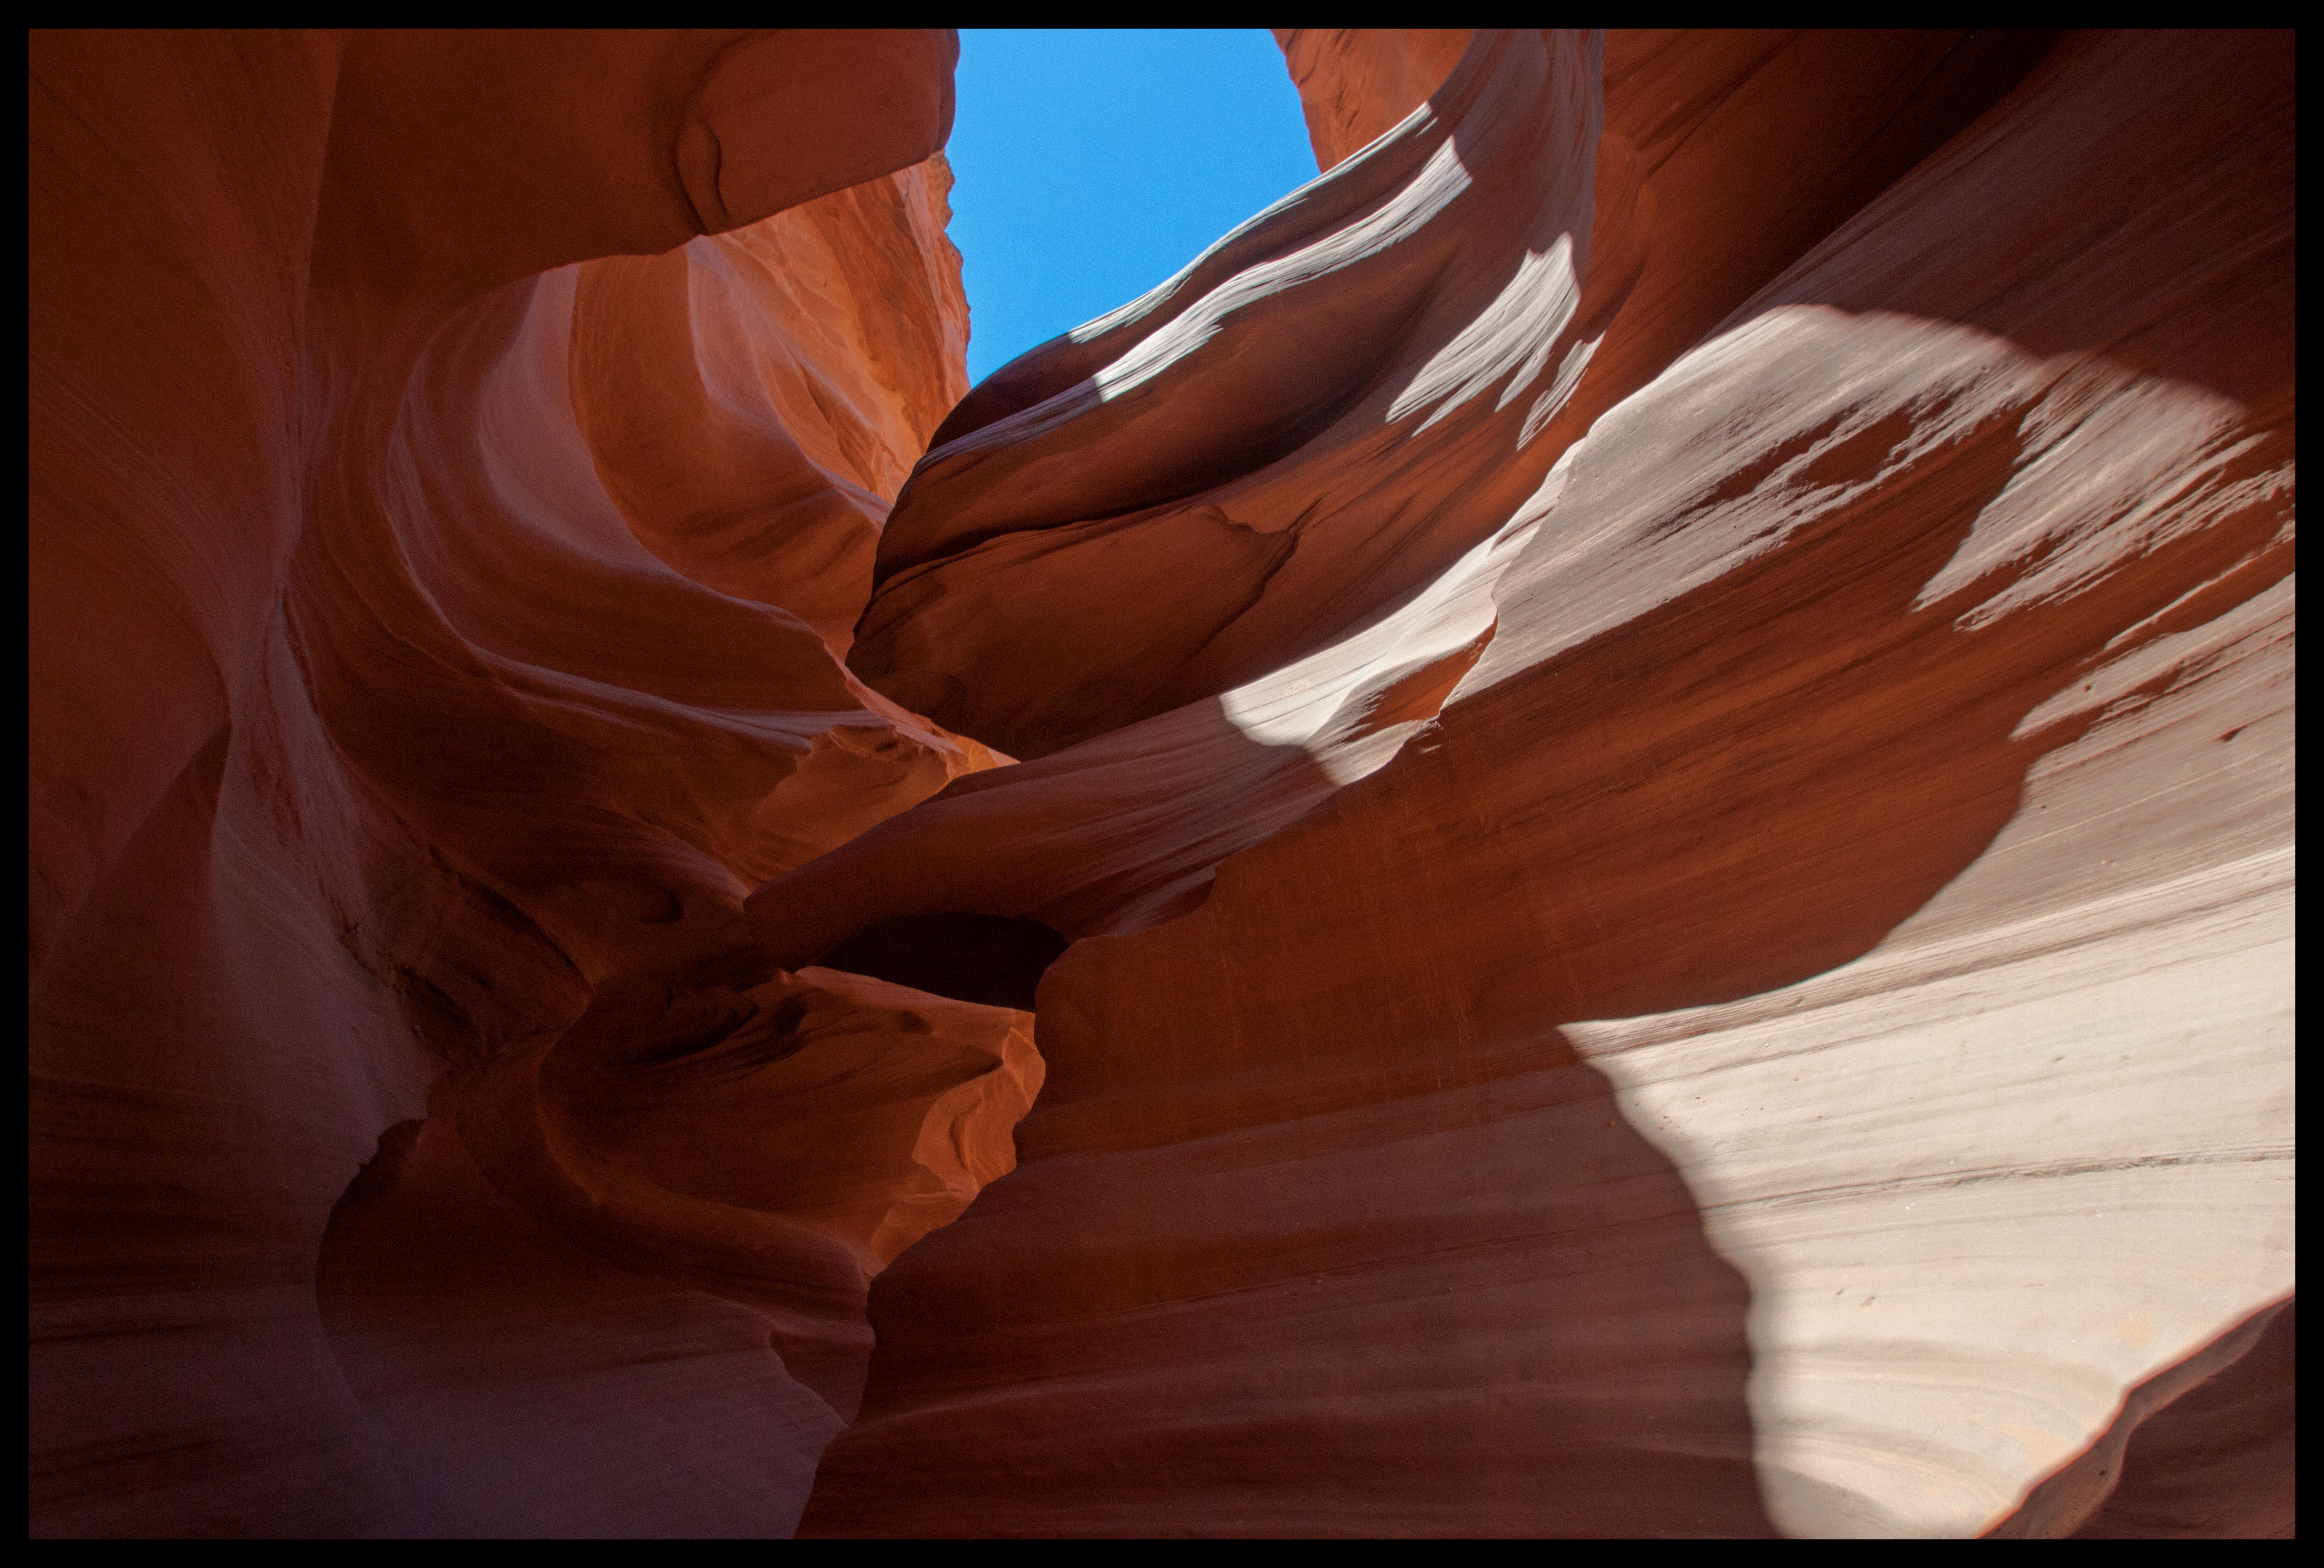
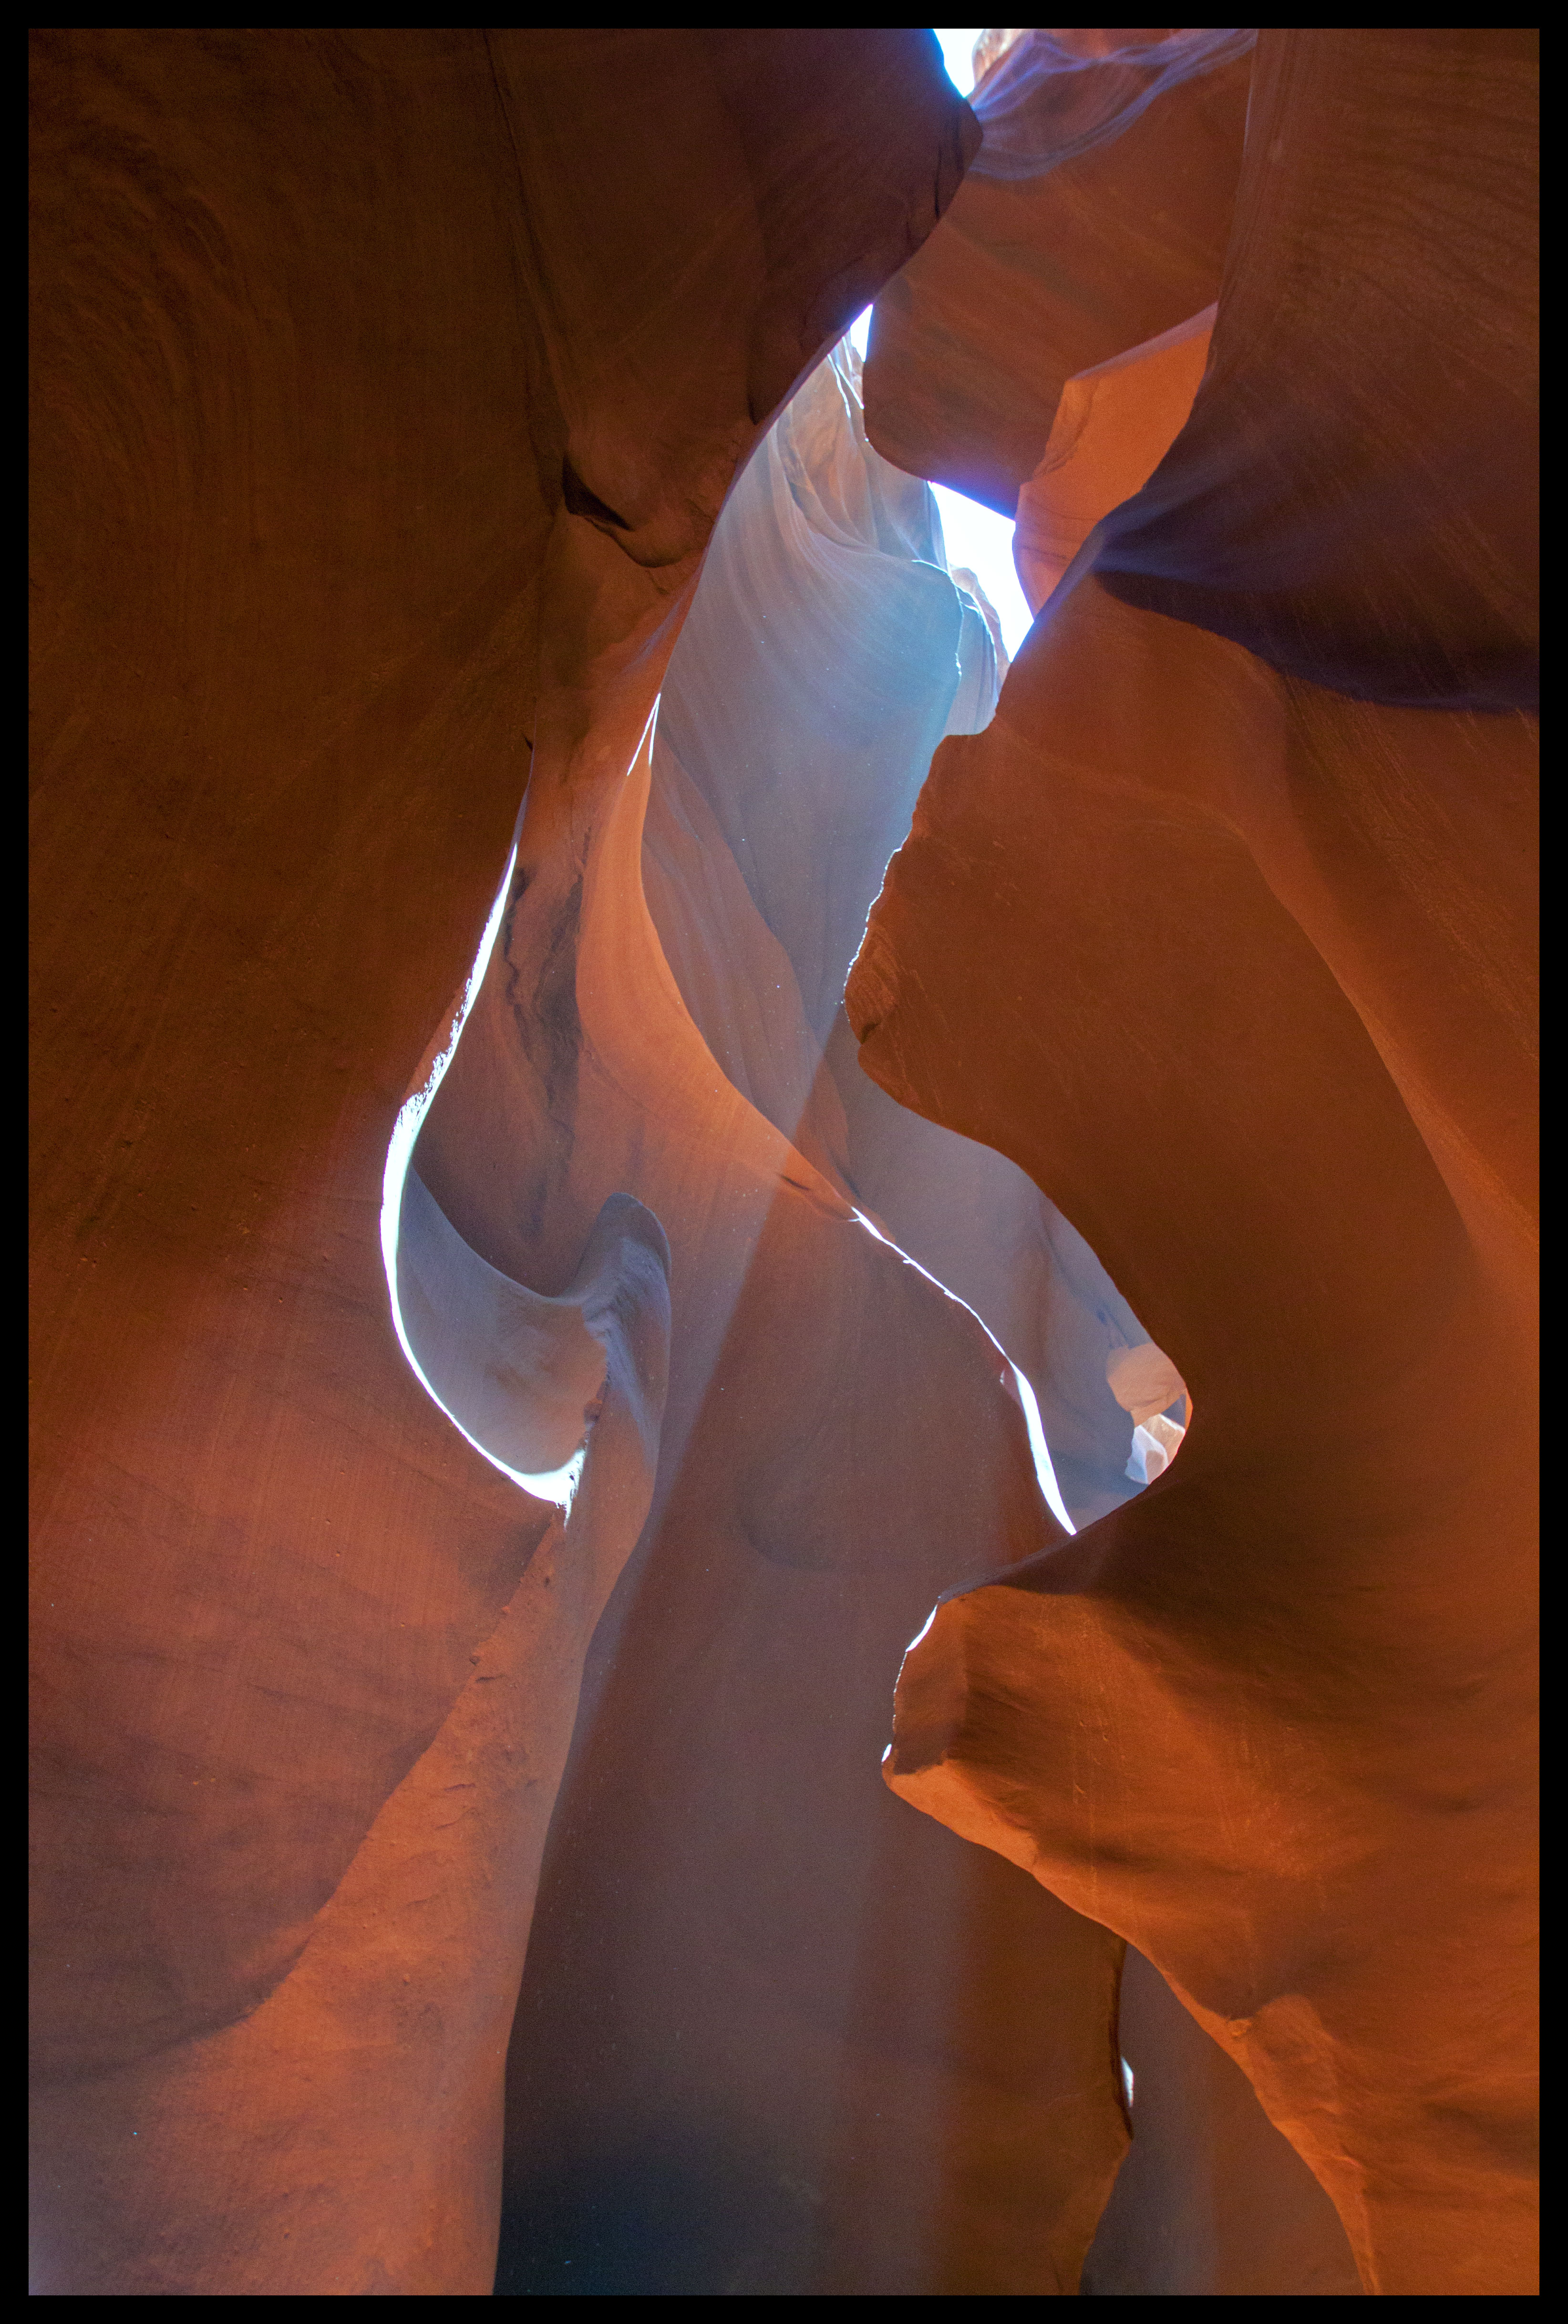
Once again, this attraction is just beautiful. Maybe going on the earliest possible tour would have made the crowd situation better, or maybe we just picked a bad weekend. I probably wouldn’t do it a second time, but don’t regret doing it at least once.
Right after exiting the canyon, we cleared out of Page and started the long drive back to Tucson. All in all, the trip was a great success. Hopefully one day I will return for the Grand Canyon.

Excellent image quality of HSB, combining two images is a very useful technique I made a mental note about. HSB-by-moonlight image is deceptive because of the brightness it seems like daytime. Antelope Canyon is fascinating for its color, energetic shapes and light effects!
Hey Roy! HDR is a great technique for those tricky lighting cases. I think the “general” method uses three images (over-exposed, under-exposed and as-close-to-correctly-exposed-as-possible). The images in this post only used two exposures. Photoshop has a built-in function to do this for you. I think on your version at KP it’s under the File menu –> Photomerge (not sure though, I use Photoshop Elements and it’s under a different menu).
Ok, thanks Emily, I’ll look for it.