06/05/2016
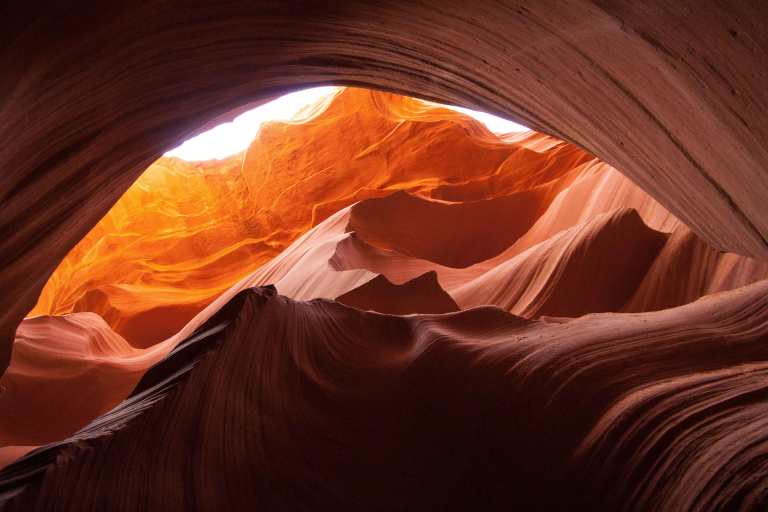
The fourth stop along my birthday trip, aside from Horseshoe Bend in the dark, was Antelope Canyon (upper-most “B” on the map below). You may remember the blog post from a previous trip to Antelope Canyon, and I’m happy to report a vastly improved experience this time around, which is why I decided to keep them as separate posts. For anyone who didn’t see the previous posting, you’ve probably still seen photos of the gorgeous red sandstone walls of Antelope Canyon, whether or not you realized it. I came across Antelope Canyon photos many times before I realized this gorgeous sight was just a few hours drive away in northern Arizona.
There are two main parts to Antelope Canyon: Lower and Upper. The Upper Canyon is wider and more easily accessible, hence much more popular. The Lower Canyon on the other hand, requires climbing ladders and squeezing through tiny cracks, so it can feel a bit more adventurous. Last time I visited, I took a photography tour through Ken’s Tours. I believe I paid $42 plus the $8 Navajo reservation fee for two hours in the canyon without a guide (currently the same price). The “tour” was an incredible disappointment, because it was impossible to get away from the crowds, or pass tour groups to get ahead. Some guides told us to go off the path to get different views, and then other guides came by and yelled at us for it. An hour and a half was spent just getting through the canyon rather than actually taking pictures. Learning my lesson, I decided to stick with the cheaper, guided tour this time around, and I’m so happy to say I was left with a drastically better impression.
The regular tour lasts for about an hour and costs $20/adult plus the $8 reservation fee (cash only). While I mentioned that Lower Antelope Canyon was less accessible than Upper, the physical activity amounts to climbing a couple sets of stairs and occasional uneven footing (it is in no way strenuous as long as you have water, which you should always have in the desert anyways). We had an amazing tour guide, Cisco, who I had actually seen mentioned in several positive TripAdvisor reviews.
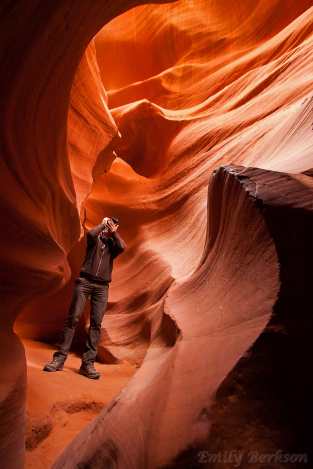
Before entering the canyon, along with giving us rules, he told everyone which camera settings to use to get the best photos. Throughout the tour, he made sure everyone noticed great photo opportunities, and offered to take a photo of each group in the canyon several times throughout the tour. We got chatty with him and stuck to the front, so as to enter each room first for photos. Another option would be to hang by the back and be the last group to leave a room.
The canyon was much less crowded this time around, possibly because we were there so early (8:40am), or possibly because they improved their procedure. Whereas there were three back-to-back groups of 20+ people running into each other on my last tour, I didn’t even notice other groups this time around. The tour didn’t feel nearly as rushed or cramped, and an hour felt like plenty of time to be in the canyon.
It’s hard to follow-up the Grand Canyon, but Antelope Canyon is a worthy contender. As Anton said, “it’s hard to take a bad picture here.” The real difficulty is picking out your best photos afterwards. I still wouldn’t rush to recommend their photography tour, but our experience on the group tour was definitely worth $28. Would recommend.
Sadly, this was the last day of our trip, and we were returning to Santa Fe that evening. Our final stop was Canyon de Chelly, which I had visited previously for the 2012 annular solar eclipse. At this point, my memory card was full, and since I had already written about Canyon de Chelly, I decided to just enjoy the views. Yet another beautiful park, and much less crowded than the Grand Canyon and Antelope Canyon, it was a perfect ending to our trip (aside from all the New Mexican food we enjoyed in Santa Fe)!
